Catalog Output
Use the Catalog Output step to encode CSV text file types or Parquet data formats using the schema defined in PDI to create a new resource or to replace or update an existing resource in Lumada Data Catalog. Metadata can be added. The data is saved in the selected Hadoop or S3 ecosystem and registered as a resource in Data Catalog.
You must have role permissions in Data Catalog to write the data resources. If a new data resource is created, it must be profiled by Data Catalog to be recognized and available for use.
For more information about accessing Lumada Data Catalog in PDI, see PDI and Data Catalog.
Before you begin
Before using the Catalog Output step, you must complete the following tasks:
- Establish a Catalog connection to Data Catalog. For details, see Access to Data Catalog.
- If you want to use S3 storage that is provided by Data Catalog, you must configure S3 as the Default S3 Connection in VFS Connections to access S3 storage. For details, see Connecting to Virtual File Systems.
- Establish a PDI connection to one or more clusters that you plan to use. For example, an HDFS driver must be configured as a named connection for your distribution for accessing HDFS storage. For information on named connections, see Connecting to a Hadoop cluster with the PDI client.
General
The following options are general to the Catalog Output transformation step:
| Option | Description |
| Step Name | Specify a unique name for the Catalog Output step. You can customize the name or use the default name. |
| Connection |
Use the Connection list to select the name of your connection to Data Catalog. See Connecting to Virtual File Systems for details. |
File tab
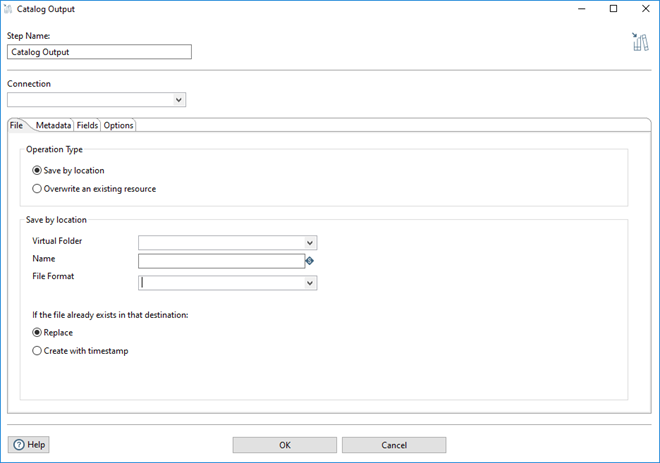
You can use options in the Operation Type section of the File tab to specify how and where data from the Catalog Output step is written.
| Option | Description |
| Save by location | Select Save by location to save your data to a specified location.
NoteIn some cases, if missing or incomplete data is returned, you may need to change the default limit for returned results. See Data Catalog searches returning incomplete or missing data for information.
|
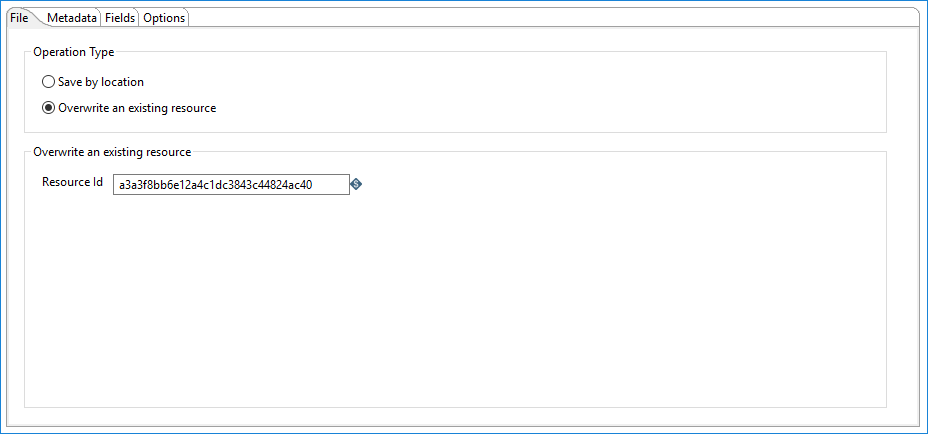
| Overwrite an existing resource | Select Overwrite an existing resource to specify a specific resource to be overwritten. |
When you select Save by location, you can update the following options to specify the file format that is used, where the data is written, and how the data is saved.
| Option | Description |
| Virtual Folder | Enter or select a virtual folder in Data Catalog where you want to save the data. |
| Name | Enter the file name and file extension for the file that you want to save. |
| File Format | Enter or select the file format for the file that you want to save. File Format is applicable only to CSV files. |
| Replace | Select Replace to replace a file. |
| Create with timestamp | Select Create with timestamp to create a new file with a timestamp for when the file is created. |
When you select Overwrite an existing resource, you can specify the resource to be overwritten in the Resource Id box.
| Option | Description |
| Resource Id | Specify the Data Catalog resource identifier of the resource that you want to overwrite. |
Metadata tab
In the Metadata tab, you can add metadata for the data being written.
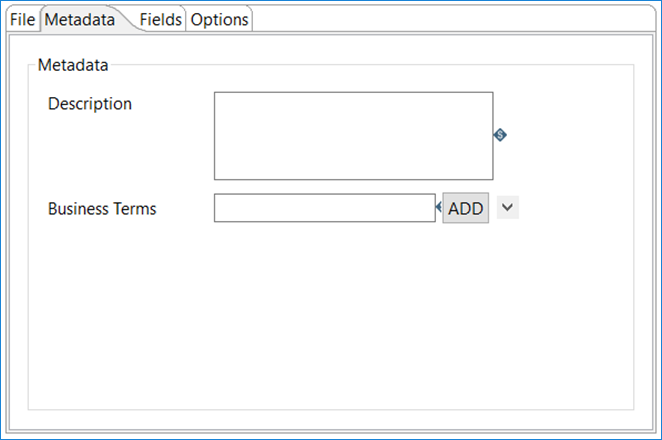
Use the following options to describe the data being written and select tags to associate with the data.
| Option | Description |
| Description | Enter a description about the data. The description replaces any existing description in Data Catalog. |
| Business Terms | Select one or more business terms in the list to associate with the data.
NoteIn some cases, if missing or incomplete data is returned, you might need to change the default limit for returned results. See Data Catalog searches returning incomplete or missing data for information.
|
| ADD | Click ADD to add the description and tags to the data that is being written. |
Fields tab
In the Fields tab, you can define properties for the fields of the data format being exported.
See Understanding PDI data types and field metadata to maximize the efficiency of your transformation and job results.
CSV fields
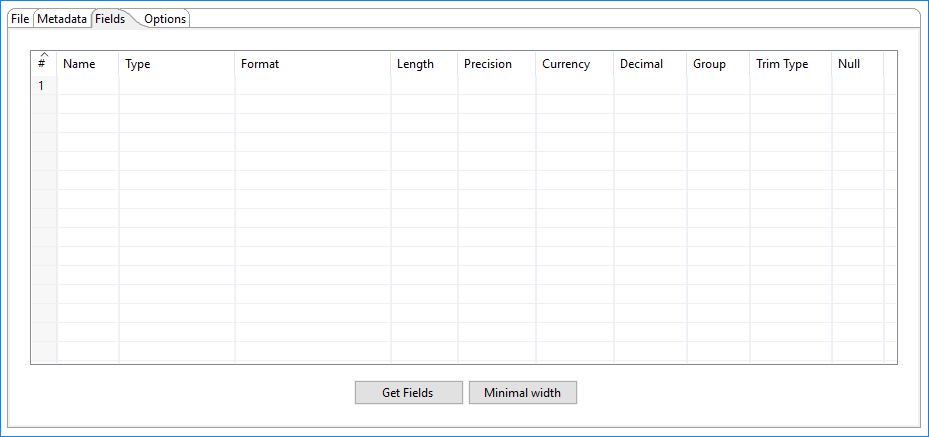
The following options display the name and format of the fields being written for CSV files.
| Column | Description |
| Name | The name of the field. |
| Type | The data type of the field. |
| Format | The format mask or number type. See Common Formats for information on date and numeric formats that are used in this step. |
| Length |
The length of the field, according to the following field types:
|
| Precision | The number of floating-point digits for number-type fields. |
| Currency | The currency symbol used by Data Catalog to represent the currency (for example, $ or €). |
| Decimal | A decimal point that is represented as either a dot '.' or a comma ',' (for example, 5,000.00 or 5.000,00). |
| Group | The punctuation that is used to separate units of thousands in numbers of four digits or larger. Units can be separated by either a comma (,), as in 10,000.00, or a period, (.) as in 5.000,00. |
| Trim type | The trimming method (none, left, right, or both) that is applied to a string to truncate the field value before processing. Trimming works only when no field length is specified. |
| Null | The string inserted into the output text file when the value of the field is null. |
Use the following options to retrieve and format field information.
| Option | Description |
| Get Fields | Click Get Fields to retrieve a list of fields from the input stream. |
| Minimal width | Click Minimal width to minimize the field length by removing unnecessary characters. If Minimal width is selected, string fields are no longer padded to their specified length. |
Options tab
In the Options tab, you can define properties for the file output.
CSV options

In the Options tab, you can define the following CSV file output options.
| Option | Description |
| Separator | Specify the character that is used to separate the fields in a single line of text. A semicolon or tab is typically used as the separator character. Click Insert TAB to place a tab in the Separator box. The default value is a semicolon (;). |
| Enclosure | Specify a character or string to be used as a pair to enclose fields. You can use the Enclosure option when you need to use separator characters in fields. The Enclosure setting is optional and can be left blank. The default value is double quotes ("). |
| Force the enclosure around fields? | Select Force the enclosure around fields? to enclose all field names with the character or string that is specified in the Enclosure box. |
| Disable the enclosure fix? | Select Disable the enclosure fix? to disregard enclosures on string fields and separators. |
| Header | Select Header to indicate that the first line in the output file is a header row. |
| Footer |
Select Footer to specify that the last line in the output file is a footer row. When using the Append option, it is not possible to strip a footer from the file content before appending new rows. |
| Format | Specify the type of formatting to use. The format can be either DOS or UNIX. UNIX files have lines separated by line feeds. DOS files have lines separated by carriage returns and line feeds. The default value for this option is CR + LF (Windows, DOS). |
| Compression | Specify the type of file compression (.ZIP or Gzip) to use when compressing the output file. Only one file is placed in a single archive. The default value is None. |
| Encoding | Specify the file encoding to use. If you want to use the default encoding on your system, leave the Encoding box blank. To use Unicode, specify UTF-8 or UTF-16. On first use, PDI searches your system for available encodings. |
| Right pad fields | Select Right pad fields to add spaces to or remove characters from the end of the fields (or remove characters at the end) until the specified field length is reached. Field length is specified in the Length column of the Fields tab. |
| Add Ending line of file | Specify an alternate ending row to the output file. |