Sqoop Import
You can use the Sqoop Import job entry to import data from a relational database into the Hadoop Distributed File System (HDFS) using Apache Sqoop. You can create, edit, and select a Hadoop cluster configuration to use. Hadoop cluster configurations settings can be reused in transformation steps and job entries that support this feature. This job has two setup modes:
- The Quick Setup mode provides the minimum options necessary to perform a successful Sqoop import. (Default)
- The Advanced Options mode provides more options to manage your Sqoop import. The Advanced Options mode also has a command line view which allows you to reuse an existing Sqoop command from the command line.
For additional information about Apache Sqoop, visit http://sqoop.apache.org/.
General (Sqoop Import)
The following fields are general to this job entry:
- Name: Specify the unique name of the job entry on the canvas. You can customize the name or leave it as the default.
- Advanced Options: Click the Advanced Options link to switch to the Advanced Options mode. You can click the Quick Setup link in the Advanced Options mode to switch to the Quick Setup mode.
Quick Setup mode
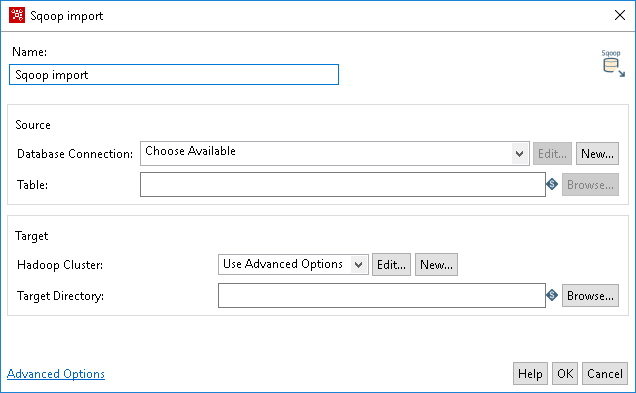
The Source refers to the database from which you want to pull your data into a cluster.
| Option | Definition |
| Database Connection |
Click Choose Available to select an existing database connection that contains the data for import. If you do not have an existing connection, click New. If you need to modify an existing connection, click Edit. |
| Edit | Click Edit to open the Database Connection dialog box if you need to modify an existing connection database. |
| New | Click New to open the Database Connection dialog box where you can add a new database connection. See Define data connections |
| Table | The name of the source table. If the source database requires a schema, you must supply it in the format: SCHEMA.TABLE_NAME. This table must exist in the
destination database and its structure must match the input data’s format. |
| Browse | Click Browse to open the Database Explorer and explore configured database connections. |
The target refers to the Hadoop cluster where you want to put your data.
| Option | Definition |
| Hadoop Cluster |
The name of the Hadoop cluster that contains the data for import. Use the Use Advanced Options to specify configuration information for the host names and ports for HDFS, Job Tracker, and other big data cluster components (default). Click Choose Available to select an existing cluster to use. If you do not have any existing cluster connections, click New. Information on Hadoop can be found in Use Hadoop with Pentaho. |
| Target Directory | Path of the HDFS directory from where you want to import. |
| Browse |
Click Browse to display the Open File dialog box, which displays the file system of the cluster. Click the directory to select the directory with your Sqoop data. Note: Browse only works when you have a valid cluster connection configured. |
When you have a valid cluster connection, click Browse to display the Open File dialog box to view the cluster files.
| Option | Definition |
| Open from Folder | Indicates the path and name of the HDFS directory you want to browse. This directory becomes the active directory. |
| Up One Level | Displays the parent directory of the active directory shown in the Open from Folder field. |
| Delete | Deletes a folder from the active directory. |
| Create Folder | Creates a new folder in the active directory. |
| Active Directory Contents (no label) | Displays the active directory, which is the one that is listed in the Open from Folder field. |
| Filter | Applies a filter to the results displayed in the active directory contents. |
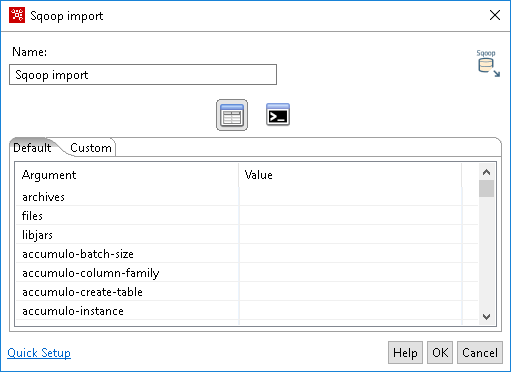
Advanced Options mode
The Advanced Options mode displays the List View by default. Click Command Line View to open the Command Line field.
| Option | Definition |
| List View |
The List View displays settings for Argument and Value pairs in the Default tab. You can modify these settings according to your needs, including options to configure an export from Hive or HBase. The Custom tab is where you can create your own Argument and Value pairs. |
| Command Line View | Click the Command Line view to enter command line arguments. A typical use is to paste an existing Sqoop command line argument into this field. |