Using the Publish Model job entry for SDR

The Publish Model job entry allows you to publish the data model created with the Build Model job entry so it is available for use on the Pentaho Server. Before publishing the model, you will have the option of sharing the data model with everyone, or a specific user or role.
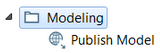
When you are building your job in Pentaho Data Integration (PDI),
you will need to place the Build Model job entry before the
Publish Model job entry, as shown here in this example, to publish the
model properly. 
After it is published to the Pentaho Server, the Data Source Wizard data source has the same name as the model in the Build Model job entry. Note that once the model is published, you won't be able to use the Data Source Wizard to edit the connection information since the connection information for this model is stored in the Build Model job entry in PDI.
Use the Publish Model job entry
Before you begin
Procedure
In the Design tab, click the Modeling folder, and then double-click the Publish Model job entry. Alternatively, you can drag the job entry icon to the job canvas.
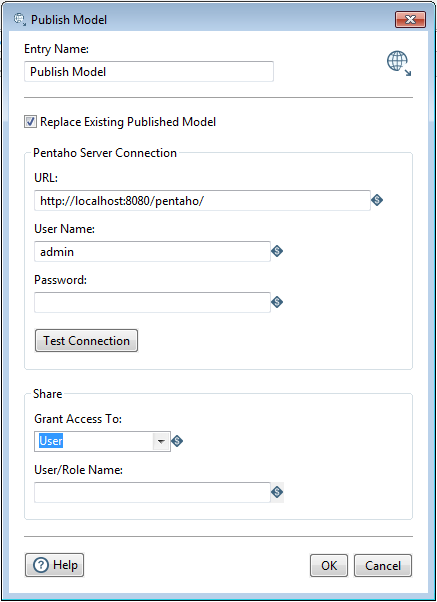
Double-click the Publish Model icon to open the Publish Model dialog box.
Enter a name for the entry in the Entry name field.
(Optional) Select the Replace Existing Published Model check box to overwrite an existing Data Source Wizard data source and database connection.
NoteTo successfully complete an SDR job, it is recommended that you select this check box. If this check box is cleared and you attempt to publish a model with the same name, the Publish Data Source job entry will fail.Fill in or edit the fields in the Pentaho Server Connection section and then test your connection:
Option Description URL The base URL string used to connect to the server. User Name The user name required to access the server. Password The password associated with the provided user name which is passed during the authentication process. Test Connection Click to test the connection to the Pentaho Server using the information provided in the above fields. When you click this button, the system will also check that the associated user is granted the Publish Content and Manage Data Sources permissions. Fill in or edit the fields in the Share section:
Field Description Grant Access To Grant access to the data model to everyone, specific users, or specific roles.
The permission granted is read-only. From the drop-down menu, you can select Everyone, User, or Role. If you select User or Role, the User/Role Name field is available.
You can use variables to populate this field. The variable can contain one of three values: everyone, user, or role. These values must be lower-case to work properly.
User/Role Name Enter the name of the user or role who will have access to the model. When finished, click OK to save your changes and close the dialog box, or click Cancel to discard your changes and close the dialog box.