Pentaho upgrade
You can upgrade your Pentaho products from version 8.3 or later to version 9.3 with the Pentaho Upgrade Installer.
The upgrade installer checks your environment for version 8.3 or later Pentaho products, creates a backup of these products, then upgrades them to version 9.3. The Pentaho Upgrade Installer works for any Pentaho products you have installed on your server or workstations, including your Pentaho Server and your Pentaho client tools. The Pentaho Upgrade Installer requires 22 GB of free space to perform the upgrade process.
This upgrade documentation assumes you are an IT administrator upgrading all your Pentaho products from 8.3 or later to 9.3. If any or all of your Pentaho products are a version earlier than 8.3, the Pentaho Upgrade Installer does not proceed with the upgrade process.
If you need to upgrade your Pentaho products from a version earlier than 8.3, such as 7.1 or higher, you must upgrade your products to version 8.3, then use the Pentaho Upgrade Installer to move from version 8.3 to 9.3. See Upgrade the Pentaho Server for instructions on upgrading from 7.1 or higher to version 8.3.
Before you begin
Procedure
Verify that your system components are current.
Your system components, such as web browsers or repository databases, must be up-to-date. See Components Reference to verify the system requirements.NoteThe Pentaho Upgrade Installer requires 22 GB of free space to perform the upgrade process.If you are upgrading an environment that includes the Pentaho Server, stop the server prior to performing backups and installation.
For instructions, see Start and stop the Pentaho Server for configuration.Review your customizations.
During the upgrade process, you can help the upgrade installer specify which items contain your customizations. See Specify customized items to address after upgrading for details. Then, after upgrading your Pentaho products to 9.3, you can merge your previous customizations into post-upgrade versions of the Pentaho files. See the Apply customizations post-upgrade task for instructions.If you are using Hadoop clusters with your Pentaho products, review and back up your site.xml files.
The upgrade process does not retain the drivers for your Hadoop clusters. You will need to re-install your drivers after completing the upgrade process. See the Install drivers for your Hadoop clusters post-upgrade task for details.If you are using plugins with your Pentaho products, review and back up your plugins to a separate directory structure.
The upgrade process does not retain your plugins. You will need to re-apply your plugins after completing the upgrade process. See the Apply your plugins post-upgrade task for details.If you are upgrading the Pentaho Server, verify that no users are logged on to the server.
As a best practice, perform the upgrade process of the Pentaho Server during off-business hours to minimize the impact to your day-to-day operations.
Next steps
Download the Pentaho upgrade file
Perform the following steps to download the file:
Procedure
On the Support Portal home page, sign in using the Pentaho support username and password provided in your Pentaho Welcome Packet.
Click Downloads, then click Pentaho 9.3 GA Release in the 9.x list.
On the bottom of the Pentaho 9.3 GA Release page, browse the folders in the Box widget to find the Utilities and Tools folder.
Depending on your platform, download one of the following files:
Linux
pentaho-update-9.3.0.0-xxx.bin
macOS
pentaho-update-9.3.0.0-xxx.zip
Windows
pentaho-update-9.3.0.0-xxx.exe
You must also download the installer-hash-files-9.3.0.0-XXX.zip file, but do not extract it. You will be prompted for the location of this file during the upgrade process.
If needed, move the downloaded file to a temporary location on your workstation.
If you are upgrading on macOS, unzip the downloaded file.
Results
Using the Pentaho Upgrade Installer
The Pentaho Upgrade Installer is a step-by-step user interface that opens and guides you through the upgrade process. If you are upgrading in an environment that does not support the display of a graphical interface, then you may want to upgrade in silent mode from a command line. For more information, see Using the Pentaho Upgrade Installer in console or silent mode.
The documentation guides you through the following process:
- The Pentaho Upgrade Installer checks your environment to ensure your earlier Pentaho products are compatible for upgrade.
- In separate files, you identify which items from the default Pentaho installation you have customized so that the upgrade installer can determine how to address these items.
- The Pentaho Upgrade Installer creates a backup of your earlier Pentaho products in case you prefer to restore them later, then installs the Pentaho 9.3 versions of the products found during the environment check.
Get started by checking your environment
Procedure
Exit out of any Pentaho products you currently have running.
If you are upgrading your Pentaho Server, stop the server. For instructions, see Start and stop the Pentaho Server for configuration.Run the update executable file you downloaded from the Support Portal. After processing, the Pentaho Upgrade Installer interface opens the Introduction window.
Click Next.
In the License Terms window, read through the license agreement and select the check box at the end of the agreement to acknowledge the terms, as shown in the following example:
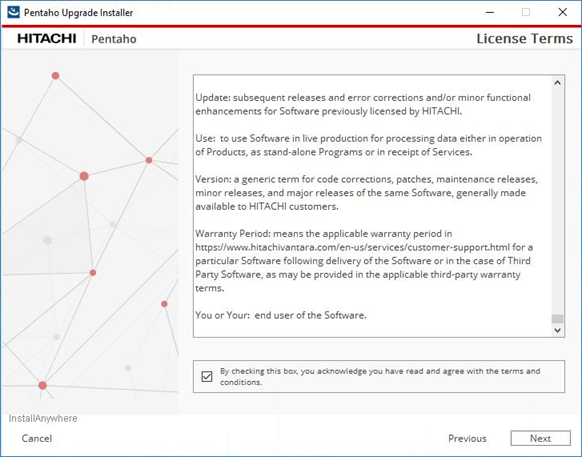
Click Next.
In the Welcome window, select Upgrade to upgrade your Pentaho products and click Next.
If you would like to restore a backup of an original installation before upgrading, select Restore and see Restoring a Pentaho Upgrade Installer backup for instructions.In the Choose Folder window, specify the root directory of your Pentaho installation in the Folder text box, then click Next.
For example, if you originally installed your Pentaho products in the default location on Windows, then you would specify C:\Pentaho for Folder. You can also use Choose to browse to the root directory. Restore Default Folder returns the value in the Folder text box to the default specified by the Pentaho Upgrade Installer.In the next Pentaho Upgrade Installer window, update the white_list.csv file by following the instructions in the Specify customized items to address after upgrading topic below. After finishing this procedure, click Next.
When prompted for the location of the hash files zip archive, specify the path to the archive, select the archive, and click Next.
NoteYou can download the hash files zip archive from the Support Portal
Results
For example, if you are upgrading a server, the Environment Check may appear similar to the following sample: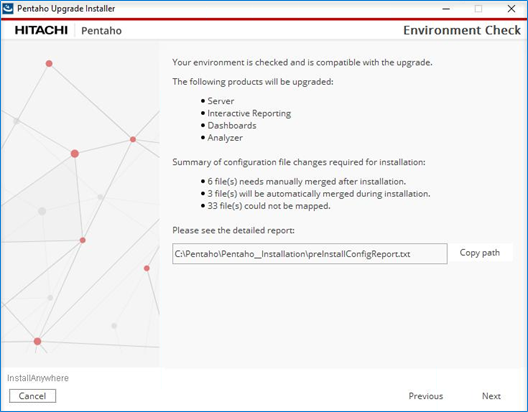
If you are upgrading a workstation, the Environment Check may appear similar to the following sample: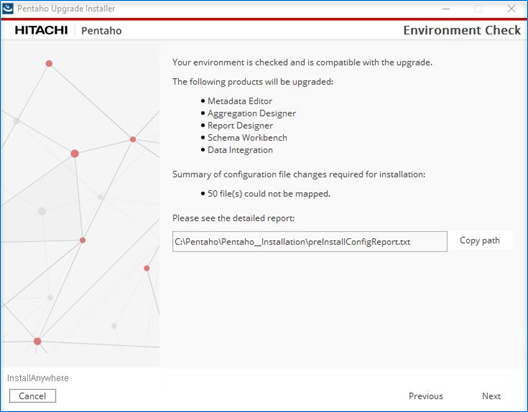
Specify customized items to address after upgrading
Customizations may include the following items:
- Configuration files you modified. If these files are listed in the white_list.csv file, then no action is required.
- Plugins or other software you added to the product, which can include the following items:
- Additional drivers
- Custom plugins
- Other end-user provided code
The upgrade installer uses your updated white_list.csv file to generate post-upgrade versions of the listed items separately from your existing versions of these items. After the upgrade process, you may need to merge content from both versions to retain your customizations.
Perform the following steps to verify the items specified in the CSV file and adjust as needed:
Procedure
Navigate to the <root installation directory>/Pentaho__Installation directory.
Verify items that you know have changed from the default Pentaho setup are listed in the white_list.csv including any drivers, plugins, and other software you added.
NoteIf you do not know which items in the report have been modified, contact your system administrator or the Support Portal for help.The CSV file contains the following two comma-separated columns:Item type
The item can be a script, configuration file, JDBC driver, directory, KTR file, KJB file, or a license file.
File or directory path
The location and file name (if the item is a file) within your Pentaho distribution. The File or directory path value can contain regular expressions.
NoteIf the item you want to include is a directory, specify the directory name without a directory separator at the end. For example: directory,data-integration/your-directory-name.
After you have updated the white_list.csv file, click Next to proceed. When the environment check step has completed, review the preInstallConfigReport.txt file and verify that all your customizations are present.
This report contains the following sections:Files that you must manually merge because they were changed before the upgrade and were also changed in this Pentaho updateFiles that were not able to be automatically mapped. You may need to manually merge these files after the upgrade.Files that are handled automatically because they were changed pre-upgrade, but are not changed in this Pentaho update
- Set up LDAP authentication, and edited the following files:
- applicationContext-pentaho-security-ldap.xml
- applicationContext-security-ldap.properties
- applicationContext-spring-security-ldap.xml
- Added a custom LDAP authentication solution under pentaho-solutions/system/my_ldap_solution.
- Added a third-party DB driver named tomcat/webapps/pentaho/WEB-INF/lib/my_db_driver.jar.
After you have completed the environment check, open the preInstallConfigReport.txt file and verify that the applicationContext-pentaho-security-ldap.xml, applicationContext-security-ldap.properties, and applicationContext-spring-security-ldap.xml files appear in the
Files that will be handled automatically because they were changed pre-upgrade, but are not changed in this Pentaho updatesection.Their presence means that your changes to these files will be present after the upgrade, and no further action is required. If changes in the upgrade have impacted these files, they will appear in the
Files that will need manually merged because they were changed pre upgrade and changed in this Pentaho updatesection.You should not see your my_ldap_solution directory or any of its contents listed in that section, nor should you see the my_db_driver.jar listed. To preserve your LDAP solution and database driver after the upgrade, you should add the following lines to the <root installation directory>/Pentaho__Installation/white_list.csv file:
directory,my_ldap_solutionfile,my_db_driver.jar
Click Previous in Environment Check window then click Next to return to the Environment Check window.
When you re-run the environment check step, the installer reads the white_list.csv again. If any changes were made, the results in the preInstallConfigReport.txt will be different.When the environment check is complete, open the <root installation directory>/Pentaho__Installation/preInstallConfigReport.txt file again, to verify that your custom code is now listed in the
Files that could not be automatically mappedsection. These files may need to be manually merged after installation section
Results
Back up your existing Pentaho products and install Pentaho 9.3
Procedure
After you verify the items in the CSV file if you have any customizations, return to the Pentaho Upgrade installer and click Next to back up your existing Pentaho installation.
NoteContact customer support if your expected Pentaho products do not appear in the list. The Pentaho Upgrade Installer backs up your existing versions of the Pentaho products if you decide to restore the earlier version after upgrading to version 9.3. If you decide to restore the backup, see Restoring a Pentaho Upgrade Installer backup for instructions.After the backup completes to 100% in the Backup window, click Next.
The Pre-Installation Summary window appears, as shown in the following example: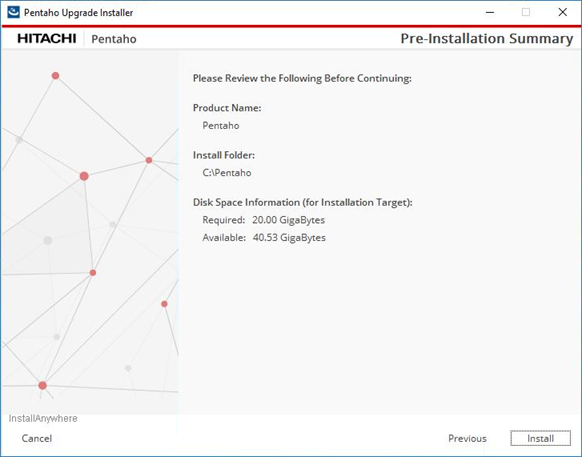 NoteIf you cancel the upgrade process after the backup of your environment is created but before the 9.3 installation, this backup will not be used by the Pentaho Upgrade Installer in any future upgrade process. To remove this backup ZIP file, navigate to the ~/.pentaho/backup directory and delete the ZIP file related to the date when the backup was performed.
Verify the information in the pre-installation summary, then click Install.
If the summary information is not what you expected, click Previous to modify any previous settings.After the installation and configuration updates complete in the Installing Pentaho window, click Next.
If errors occur, examine the log files for details about how to resolve the error. Depending on the error, you may need to contact customer support for help. The default location of the log files is <root installation directory>/Pentaho__Installation/logs.After the installation part of the upgrade process, a post-install report is generated to specify which files may have been modified from the default Pentaho setup for customizations.
In the Install Complete window, click Done to exit the Pentaho Upgrade Installer.
Apply the version 9.3 licenses to your upgraded Pentaho products.
See Manage Pentaho licenses for instructions.(Optional) If you have modified any items from the default Pentaho setup for customizations, use the post-install report to determine which items need to be merged.
Seen the Apply customizations post-upgrade task for instructions.If you are upgrading your Pentaho Server, restart the Pentaho Server.
Next steps