Select Values

The Select values step can perform all the following actions on fields in the PDI data stream:
- Select values
- Remove values
- Rename values
- Change data types
- Configure length and precision of values
General
The following field and option is general to this transformation step:
- Step Name: Specify the unique name of the Select values step on the canvas. You can customize the name or leave it as the default.
Options
The Select values transformation step features several tabs with fields. Each tab is described below.
Select & Alter tab
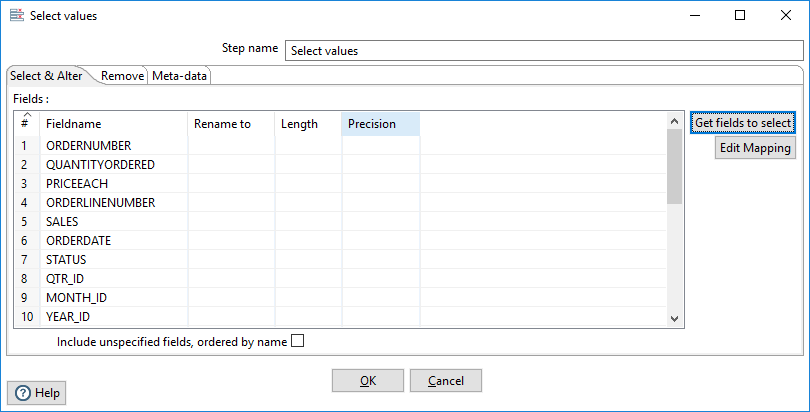
The table in this tab contains the following columns for fields you want to select, rename, or change length and precision.
| Column | Description |
| Fieldname | The name of the field from the input stream. |
| Rename to | The new name of the field. Leave blank if you do not wish to rename the field. |
| Length | The length of the field. |
| Precision | The number of floating point digits for number-type fields. |
Use Get fields to select to add all fields from the input stream(s).
Use Edit Mapping to open the Edit Mapping dialog.
Select the Include unspecified fields, ordered by name option to include fields in the input stream(s) that are not explicitly selected in the Fields section.
Edit Mapping
Use the Edit Mapping dialog box to easily define multiple mappings between source and target fields.
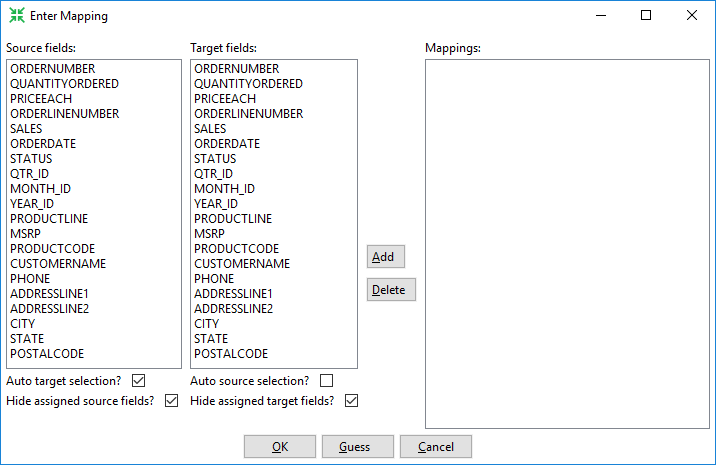
The Edit Mapping dialog box contains the following options:
| Option | Description |
| Source fields | Select to highlight the fields from the incoming stream you want to map. |
| Target fields | Select to highlight the fields in the output table you want to map. |
| Add (Button) | Click Add to move a selected combination of a field name and a column name to the Mappings pane. |
| Delete (Button) | Click Delete to move a mapped combination from the Mappings pane back to the Source fields and Target fields panes. |
| Mappings | The field to column mapping designating the incoming field and the table column where the field will be assigned. |
| Auto target selection? | Select to have the step perform mapping to a target. |
| Hide assigned source fields? | Select to remove a field from the Source fields pane when it has been matched and moved to the Mappings pane. |
| Auto source selection | Select to automatically select a field from the Source fields pane when a column name is selected. |
| Hide assigned target fields? | Select to remove a field from the Target fields pane when it has been matched and moved to the Mappings pane. |
| Guess (Button) | Click Guess to perform automatic matching of all fields and population of the Mappings pane. |
Your mapping results display in the Mappings panel.
Remove tab
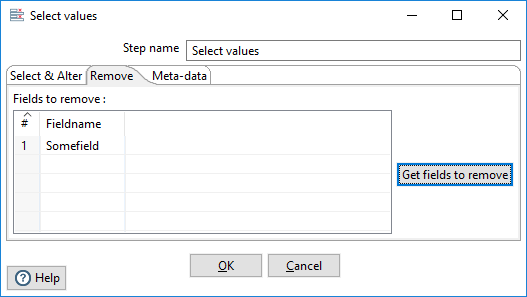
This tab allows you to remove fields from the input stream. Click Get fields to remove to add fields from the incoming PDI stream.
Meta-data tab
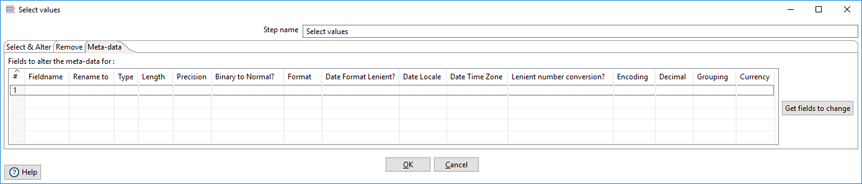
The table in this tab contains the following columns for fields you want to rename input fields, convert them to different data types, and alter their length, and precision.
| Column | Description |
| Fieldname |
The name of the imported field. If you renamed a field on the Select & Alter tab, the name here must match the renamed value. |
| Rename to | The new name of the field. Leave blank if you do not wish to rename the field. |
| Type | The data type for this field. |
| Length | The length of the field. |
| Precision | The number of floating point digits for number-type fields. |
| Binary to Normal? | Specify Y or N to convert a string to a numeric data type, when appropriate. |
| Format | The format mask. See Common Formats for information on common valid date and numeric formats you can use in this step. |
| Date Format Lenient? | Specifies whether the date parser is strict or lenient. Set to N to accept only strictly valid date values. When set to Y, the parser attempts to determine the intention of an incorrect date, if possible, and correct it. |
| Date Locale | The date locale to use for date conversions and calculations. Leave blank to use the default encoding on your system. |
| Date Time Zone | The date time zone to use for date conversions and calculations. Leave blank to use the default encoding on your system. |
| Lenient number conversion | Specifies whether to report an error when parsing numbers. When set to Y, numbers are parsed until a non-numeric value such as a dash or slash is found. The parsing then stops without reporting an error. When set to N, the parser reports an error in case when invalid numbers are in the input. |
| Encoding | The text file encoding to use. Leave blank to use the default encoding on your system. The list is populated from the available encodings on your system. |
| Decimal | The decimal point as either a period or a comma. |
| Grouping | The separator for units of thousands as either a dot or a comma. |
| Currency | The currency symbol. |
Use Get fields to change to import fields from previous steps.
See Understanding PDI data types and field metadata to maximize the efficiency of your transformation and job results.
Examples
The design-tools/data-integration/samples/transformations directory contains the following example KTRs that show how to use this step:
- Select values - some variants.ktr
- Select Values - copy field values to new fields.ktr
Metadata injection support
All fields of this step support metadata injection. You can use this step with ETL metadata injection to pass metadata to your transformation at runtime.