XML Output

The XML Output step writes rows from any source to one or more XML files.
General
Enter the following information for the step:
- Step name: Specify the unique name of the transformation on the canvas. You can customize the name or leave it as the default.
Options
 The XML Output transformation step features tabs to specify information about the output file, content, and fields.
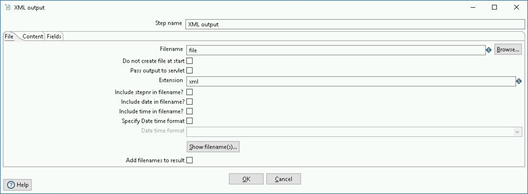
File tab
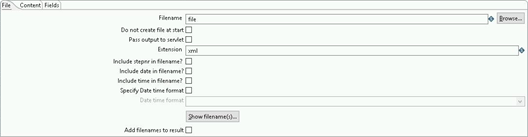 Use the File tab to define general properties for the format of the output XML file.
| Option | Description |
| Filename |
Specify the file name and location of the output file. Click Browse to open the Open File window and navigate to the file or folder. For the supported file system types, see Connecting to Virtual File Systems. Do not include a file extension when the date and time are to be appended and the Extension option is specified. |
| Do not create file at start | Select to avoid the creation of empty files when no rows are processed. |
| Pass output to servlet | Select to return the data using a web service instead of writing to a file. See Web services steps for information. |
| Extension | Specify the three-letter file extension to append to the file name. The default is .xml. |
| Include stepnr in filename | Select to include the copy number in the file name (_0, for example) when you run the step in multiple copies, that is, launching several copies of a step. |
| Include date in filename | Select to include the system date in the file name (_20220501, for example). |
| Include time in filename | Select to include the system time in the file name (_235959, for example). |
| Specify Date time format | Select to include the date and time in the file name using a format from the Date time format drop-down list. |
| Date time format | Select the date time format. |
| Add filenames to result | Select this option if you want to add file names to the results of this step. Clear this option if you do not want to add file names to the results of this step. |
Click Show filename(s) to display a simulated list of the files that are generated by this step. This simulation depends on the number of rows that go into each file.
Content tab
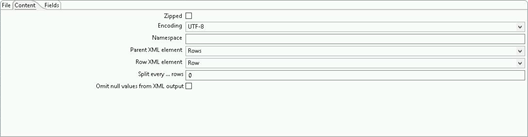
Use the Content tab to include the following options for the output XML file.
| Option | Description |
| Zipped | Select this option if you want the XML file to be stored in a ZIP archive. |
| Encoding | Specify the file encoding to use. Leave blank to use the default encoding on
your system. To use Unicode, specify UTF-8 or
UTF-16. On first use, PDI searches your system for
available encodings. The encoding specified is noted in the header of the output XML
file. |
| Namespace | Specify the default namespace, which is a collection of names that can be used for uniquely named elements and attributes. A runtime check occurs that ensures the URI of the default namespace is a valid URI. A runtime error stops the transformation and logs an error if the URI is invalid. |
| Parent XML element | Select the name of the root element in the XML document. |
| Row XML element | Select the name of the row element to use in the XML document. |
| Split every ... rows | Specify the maximum number of rows of data to generate to a single XML file before another file is created. |
| Omit null values from XML output | Select this option to exclude elements containing null values from the output XML file. Clear this option to include elements containing null values in the output XML file. You can specify another value to replace null with the Null field in the Fields tab. For example, you may have the <?xml version='1.0' encoding='UTF-8'?> <Rows xmlns="namespace&"> <Row><data1>ABCD</data1> </Row> </Rows> If you clear Omit null values from XML output, then the <?xml version='1.0' encoding='UTF-8'?> <Rows xmlns="namespace&"> <Row><data1>ABCD</data1> <data2/></Row> </Rows> |
Fields tab
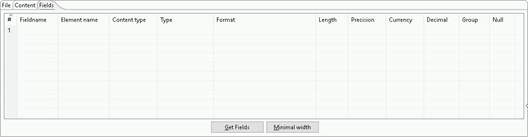
Use the Fields tab to define the properties for the fields exported to the output XML file.
| Column | Description |
| Fieldname | The name of the field. |
| Element name | The name of the element in the XML file to use. |
| Content type | The type of data in the contents of the element. |
| Type | The type of the field, either String, Date, or Number. Format masking conversion is used for numeric data. See Number Formats for a complete description of format specifiers. |
| Format | The format mask (number type). See Common Formats for information on common valid date and numeric formats you can use in this step. |
| Length | The length of the field, which depends on the following field type:
NoteThe output string is padded to this length if it is specified. |
| Precision | The number of floating point digits for number-type fields. |
| Currency | The symbol used to represent currencies (for example, $10,000.00 or €5.000,00) |
| Decimal | The symbol used to represent a decimal point, either a period (.) as in 10,000.00 or it can be a comma (,) as in 5.000,00 |
| Group | The method used to separate units of thousands in numbers of four digits or larger, either a comma (,) as in 10,000.00 or (.) as in 5.000,00 |
| Null | The string to insert into the output XML file when the value of the field is null |
Select Get Fields to retrieve a list of fields from the incoming PDI data stream.
Select Minimal Width to minimize the field length by removing unnecessary characters. If selected, string fields are no longer padded to their specified length.
Metadata injection support
All fields of this step support metadata injection. You can use this step with ETL metadata injection to pass metadata to your transformation at runtime.