Using the Avro Input step on the Pentaho engine

If you are running your transformation on the Pentaho engine, use the following instructions to set up the Avro Input step.
General
The following fields and button are general to this transformation step:
- Step name: Specify the unique name of the Avro Input step on the canvas. You can customize the name or leave it as the default.
You can use Preview to display the rows generated by this step. The Avro Input step determines what rows to input based on the information you provide in the option tabs. This preview function helps you to decide if the information provided accurately models the rows you are trying to retrieve.
Options
The Avro Input transformation step features several tabs with fields. Each tab is described below.
Source tab
Use the Source tab to specify the location of the source data and its related schema. The schema that defines the Avro data is either embedded or in a different location.
Use Format to select from one of the following formats:
Avro file
The source material is in a single location. The schema is embedded with the data.
JSON datum
The source material is in different locations. The data is contained in a JSON format, and the schema is separate from the data.
Binary datum
The source material is in different locations. The data is contained in a binary format, and the schema is separate from the data.
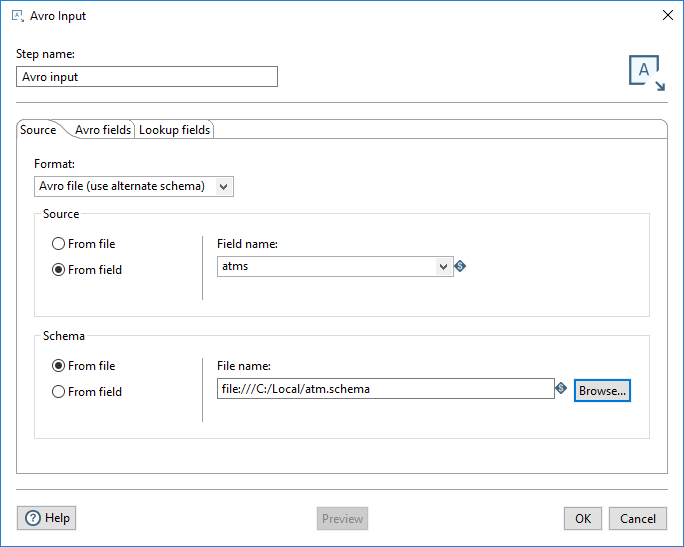
Avro file (use alternate schema)
The source material is in different locations. The schema is separate from the data.
The options presented in the Source tab depend on whether the schema is embedded with or separate from the data.
Embedded schema
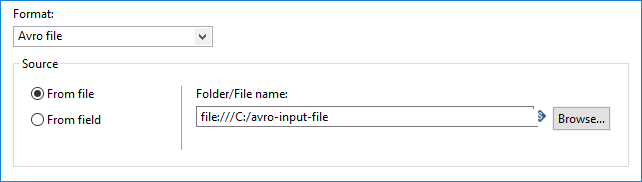
If you select Avro file as your Format, the Avro Input step assumes the schema is embedded with your data. The location of the source can be either a file or a PDI field.
| Option | Description |
| Source |
Specify the location of the source data and embedded schema:
|
Separate schema
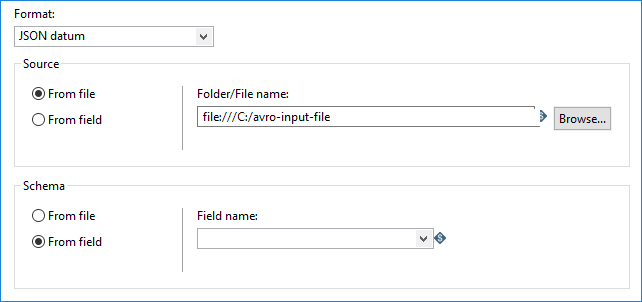
If you select JSON datum, binary datum, or Avro file (use alternate schema), the Avro Input step assumes the schema is in a separate location from your data. The location of the data and its schema can be either a file or a PDI field.
| Option | Description |
| Source | Specify the location of the source data:
|
| Schema | Specify the location of the source schema:
|
Avro Fields tab
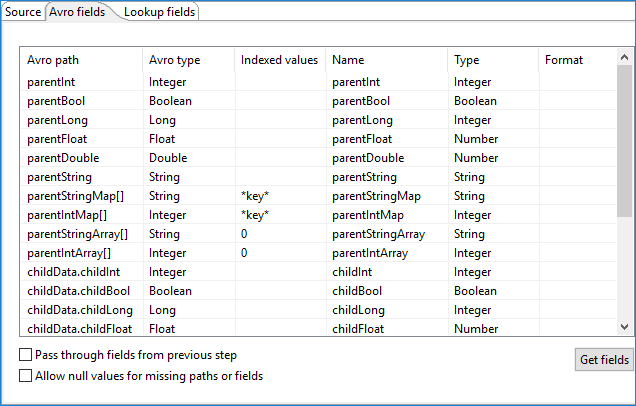
The table in the Avro Fields tab defines the following properties for the input fields from the Avro source:
| Field Property | Description |
| Avro path (Avro type) | The location of the Avro source (and its format type). |
| Indexed values |
The index key to use in an Avro path collection. You can use this field for map or array expansion, which expands array or map values to return multiple rows of data.
When this field is left blank, data is not returned for the field. |
| Name | The name of the input field. |
| Type | The type of the input field, such as String or Date. |
| Format | The format of the input field. |
The Avro Fields tab also contains the following options for specifying how certain fields behave in this step:
| Option | Description |
| Pass through fields from previous step |
Specify how fields pass through this step:
|
| Allow null values for missing paths or fields |
Specify how missing fields should be replaced:
|
After you have provided a path to an Avro data file or Avro schema, click Get Fields to populate the fields.
These fields represent the Avro schema. When the schema field is retrieved, the Avro type is converted to an appropriate PDI type. A user can change the PDI type. Below is the Avro-to-PDI data type conversion table.
| Avro Type | PDI Type |
| String | String |
| TimeStamp | TimeStamp |
| Bytes | Binary |
| Decimal | BigNumber |
| Boolean | Boolean |
| Date | Date |
| Long | Integer |
| Double | Number |
| int | Integer |
| float | Number |
Lookup Fields tab
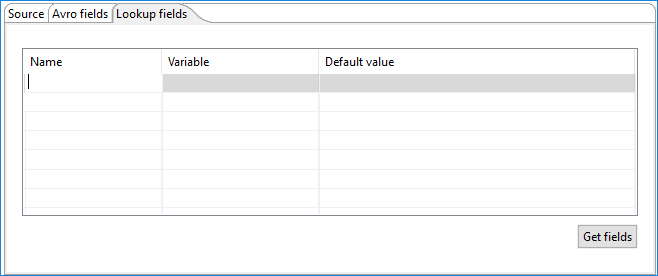
You can use the Lookup Fields tab to create variables and map them to a specific field to use as lookups into an Avro structure at decoding time. The table in this tab defines the following field properties:
| Field Property | Description |
| Name | The name of the incoming field |
| Variable | The variable you want to use as the value of an incoming field |
| Default value | The value to use when the incoming field value is null |
Click Get fields to populate the Name column with names of the incoming fields.
Sample transformation walkthrough using the Lookup field
Procedure
Save the following code block in a text file as atm.schema.
{
  "type": "map",
        "values":{
        "type": "record",
        "name":"ATM",
        "fields": [
                  {"name": "serial_no", "type": "string"},
                  {"name": "location", "type": "string"}
        ]
        }
}
Save the following code block in a text file as simpleexample.csv:
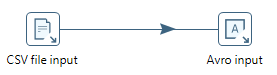
atm|atms
atm1|{"atm1": {"serial_no": "zxy555", "location": "Uptown"}, "atm2": {"serial_no": "vvv242", "location": "Downtown"}, "atm4": {"serial_no": "zzz111", "location": "Central"}, "atm6": {"serial_no": "piu786", "location": "Eastside"}, "atm10": {"serial_no": "hbc999", "location": "Westside"}, "atm20": {"serial_no": "mmm456", "location": "Lunar city"}}
atm2|{"atm1": {"serial_no": "zxy555", "location": "Uptown"}, "atm2": {"serial_no": "vvv242", "location": "Downtown"}, "atm4": {"serial_no": "zzz111", "location": "Central"}, "atm6": {"serial_no": "piu786", "location": "Eastside"}, "atm10": {"serial_no": "hbc999", "location": "Westside"}, "atm20": {"serial_no": "mmm456", "location": "Lunar city"}}
atm4|{"atm1": {"serial_no": "zxy555", "location": "Uptown"}, "atm2": {"serial_no": "vvv242", "location": "Downtown"}, "atm4": {"serial_no": "zzz111", "location": "Central"}, "atm6": {"serial_no": "piu786", "location": "Eastside"}, "atm10": {"serial_no": "hbc999", "location": "Westside"}, "atm20": {"serial_no": "mmm456", "location": "Lunar city"}}
Create a transformation with a CSV File Input step and a hop from the CSV Input step to the Avro Input step.
Configure the CSV File Input step as shown below, where the file name is the path to the simpleexample.csv file on your system:
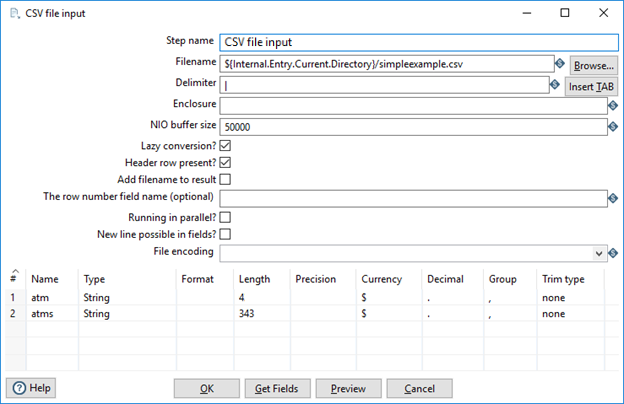 NoteMake sure that the delimiter is the pipe character.
Configure the Avro File Input step tabs as shown below, where the schema is the path to the atm.schema file on your system:
Click Get fields to populate the Avro fields table. Enter the Indexed values field as shown below:
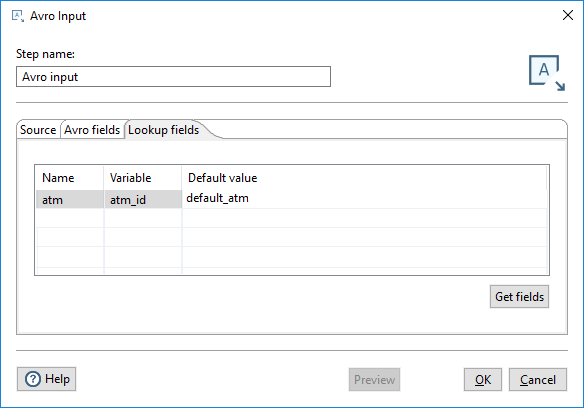
 NoteMake sure to select the Pass through fields from previous step option.
Enter the following values in the Lookup fields tab:
Click Preview to view the data.
You should see results similar to the results shown below:
Save your transformation.
Metadata injection support
All fields of this step support metadata injection. You can use this step with ETL metadata injection to pass metadata to your transformation at runtime.