Using the Text File Output step on the Pentaho engine

If you are running your transformation on the Pentaho engine, use the following instructions to set up the Text File Output step.
General
Enter the following information in the transformation step name field:
- Step name: Specifies the unique name of the Text file output transformation step on the canvas. You can customize the name or leave it as the default.
Options
The Text file output step features several tabs. Each tab is described below.
File tab
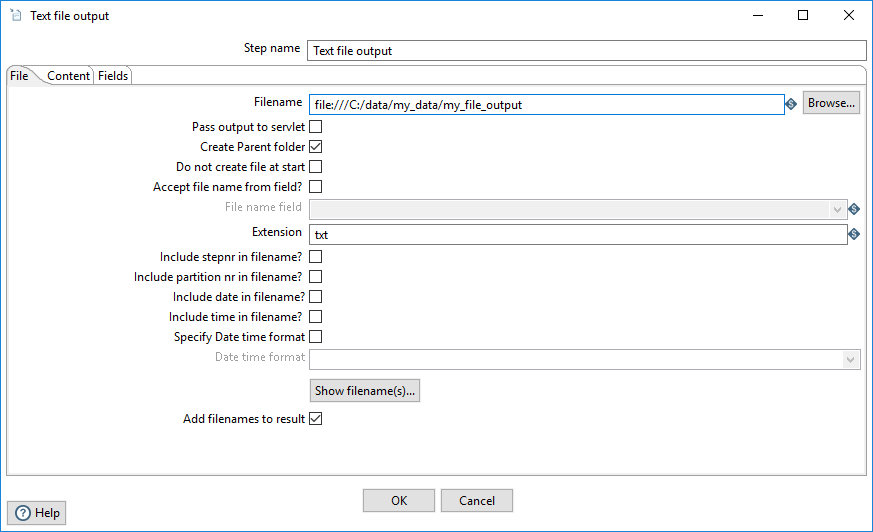
On the File tab, you can define basic properties about the file being created by this step.
| Option | Description |
| Filename |
Specify the file name and location of the output file. Click Browse to display the Open File window and navigate to the file or folder. For the supported file system types, see Connecting to Virtual File Systems. Do not include a file extension when the date and time are to be appended and the Extension option is specified. |
| Pass output to servlet | Select to return the data using a web service instead of writing to a file (see Web services steps for information). |
| Create Parent folder | Clear if you do not want to create a parent folder for the output file. |
| Do not create file at start | Select to avoid the creation of empty files when no rows are processed. |
| Accept file name from field? |
Select to assign the output file name(s) as found in the input stream and selected using the File name field option. This setting can be fine-tuned with the Kettle properties file. See Improving performance when writing multiple files . |
| File name field | Specify the field in the input stream that will contain the file name(s) at runtime. |
| Extension | Specify the three-letter file extension to append to the file name. The default is .txt. |
| Include stepnr in filename? | Select to include the copy number in the file name (_0, for example) when you run the step in multiple copies (launching several copies of a step). |
| Include partition nr in filename? | Select to include the data partition number in the file name. |
| Include date in filename? | Select to include the system date in the file name (_20181231, for example). |
| Include time in filename? | Select to include the system time in the file name (_235959, for example). |
| Specify Date time format | Select to include the date time in the file name using a format from the Date time format drop-down list. |
| Date time format | Select the date time format. |
| Add filenames to result | Clear if you do not want to add file names to the output file. |
Click Show filename(s) to display a list of the files that will be generated. This is a simulation and depends on the number of rows that go into each file.
Content tab
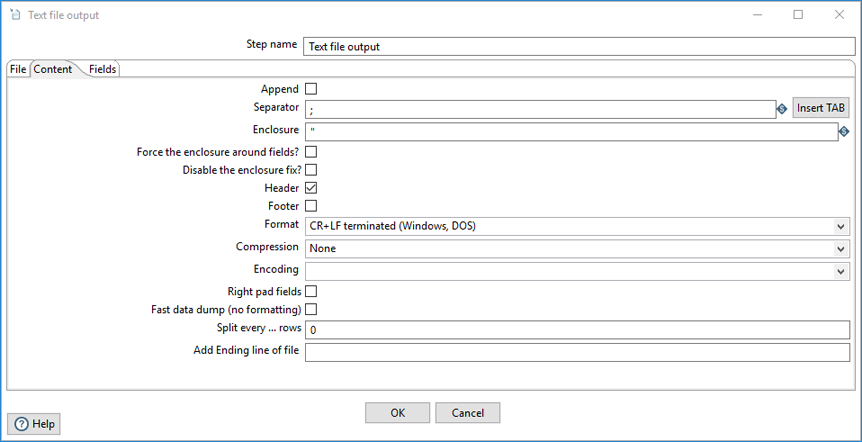
The Content tab allows you to include the following options for the output text file.
| Option | Description |
| Append | Select to append lines to the end of the file. |
| Separator | Specify the character used to separate the fields in a single line of text, typically a semicolon or tab. Click Insert Tab to place a tab in the Separator field. The default value is semicolon (;). |
| Enclosure | Specify to enclose fields with a pair of specified strings. It allows for separator characters in fields. This setting is optional and can be left blank. The default value is double quotes ("). |
| Force the enclosure around fields? | Specify to force all field names to be enclosed with the character specified in the Enclosure option. |
| Disable the enclosure fix? | Specify to disregard enclosures on string fields and separators. |
| Header | Clear to indicate that the first line in the output file is not a header row. |
| Footer |
Select to specify that the last line in the output file is a footer row. When using the Append option, it is not possible to strip a footer from the file content before appending new rows. |
| Format | Specify the type of formatting to use. It can be either DOS or UNIX. UNIX files have lines separated by line feeds, while DOS files have lines separated by carriage returns and line feeds. The default value is CR + LF (Windows, DOS). |
| Compression | Specify the type of compression (.ZIP or Gzip) to use when compressing the output file. Only one file is placed in a single archive. The default value is None. |
| Encoding | Specify the file encoding to use. Leave blank to use the default encoding on your system. To use Unicode, specify UTF-8 or UTF-16. On first use, PDI searches your system for available encodings. |
| Right pad fields | Select to add spaces to the end of the fields (or remove characters at the end) until the length specified in the table under the Fields tab is reached. |
| Fast data dump (no formatting) | Select to improve the performance when dumping large amounts of data to a file by not including any formatting information. |
| Split every ... rows | Specify to split the resulting file into multiple parts of N rows if the number N is larger than zero. |
| Add Ending line of file | Specify an alternate ending row to the output file. |
Fields tab
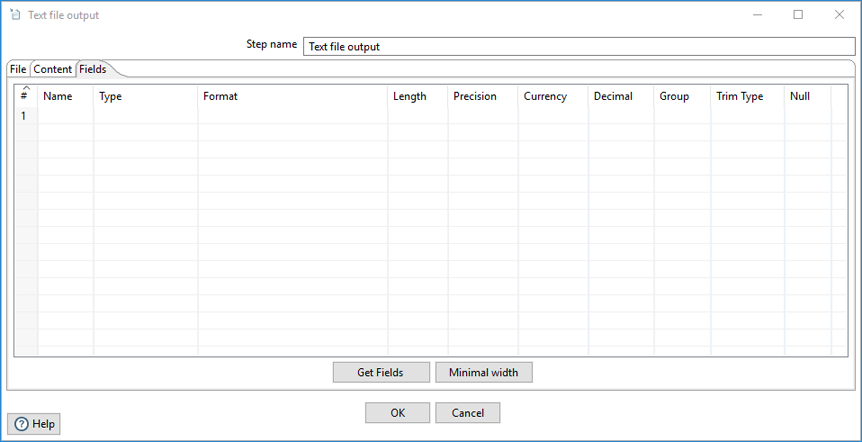
The Fields tab allows you to define the properties for the fields being exported.
| Column | Description |
| Name | Specify the name of the field. |
| Type | Select the field's data type from the dropdown list or enter it manually. |
| Format | Select the format mask (number type) from the dropdown list or enter it manually. See Common Formats for information on common valid date and numeric formats you can use in this step. |
| Length |
Specify the length of the field, according to the following field types:
|
| Precision | Specify the number of floating point digits for number-type fields. |
| Currency | Specify the symbol used to represent currencies (for example, $ or €). |
| Decimal | Specify the symbol used to represent a decimal point, either a period (.) as in 10,000.00 or it can be a comma (,) as in 5.000,00. |
| Group | Specify the method used to separate units of thousands in numbers of four digits or larger, either a comma (,) as in 10,000.00 or (.) as in 5.000,00. |
| Trim type | Select the trimming method (none, left, right, or both) to apply to a string, which truncates the field before processing. Trimming only works when no field length is specified. |
| Null | Specify the string to insert into the output text file when the value of the field is null. |
| Get Fields (button) | Click to retrieve a list of fields from the input stream. |
| Minimal width (button) | Click to minimize the field length by removing unnecessary characters. If selected, string fields will no longer be padded to their specified length. |
See also
If you want to use a text file output to run a command, script, or database bulk loader, see the Text File Output (Legacy) transformation step.
Metadata injection support
All fields of this step support metadata injection. You can use this step with ETL metadata injection to pass metadata to your transformation at runtime.