Model - Import/Export tool

You can use the Model - Import/Export tool, a migration utility that functions like a data model mapper, to export and import entities according to the applicable environment:
- In environments with different data mappings, you can export or import the basic definitions of Data Catalog assets or the data model.
- In environments with matched data mappings, you can export or import most of the asset metadata.
The following metadata can be exported and imported:
- Data sources
- User roles
- Glossaries
- Business terms
- Term associations
- Virtual folders
- Custom properties
Exporting metadata
You can export metadata from Data Catalog and save the metadata in a CSV format.
The entities are exported to a file in CSV format with the following file name convention:
exported_<entity>.csv
For example:
exported_termassociations.csv
exported_customproperties.csv
exported_glossaries.csv
exported_folders.csv
exported_userroles.csv
exported_sources.csv
exported_businessterms.csv
Export metadata
Follow the steps below to export metadata in a CSV format:
Procedure
On the Home page from the left-side menu bar, click Tools.
The Tools page opens.Select the Model – Import / Export tab.
The Model – Import / Export Tool page opens.Click Export.
The export-specific fields appear.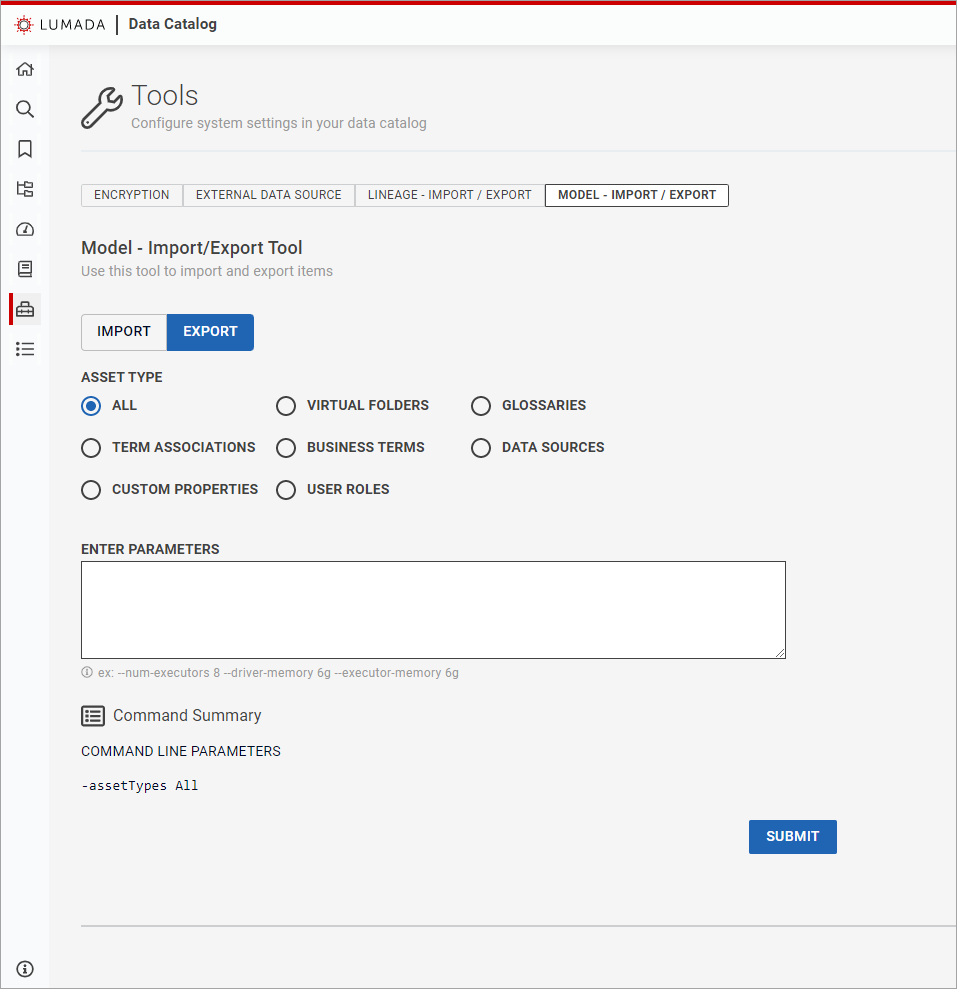
Select the asset type of the exported metadata.
The default value is All of the types.In the Enter Parameters text box, enter any optional command line parameters, such as [
The specified parameters appear in the Command Summary section.--num-executor], [--driver-memory] or [--executor-memory], that you want to apply to the export.Click Submit.
Results
Importing metadata
You can import metadata that has been saved in the pre-defined Data Catalog CSV file format.
To import user roles, data sources, and term associations, you must maintain the following import-export compatibility:
- Use only the CSV metadata files that were exported earlier from Data Catalog.
- Use the same version of the Model - Import/Export Tool that was used for exporting the metadata files.
Metadata file structures
The data is formatted inside the CSV file. When you are importing metadata into Data Catalog, a specific import sequence is required due to internal dependencies. For example, if you are importing business terms, make sure the required glossary is available in Data Catalog. If not, import the glossary first and then import the business terms. These dependencies are described for each of the metadata types, below.
Data sources
When you are importing data sources, make sure to create and connect agents, and profile the data before importing any term associations.
The data source import file should have the following columns in this order:
- DATASOURCE_NAME
- DATASOURCE_DESC
- DATASOURCE_TYPE
- DATASOURCE_PATH
- DATASOURCE_URL
- DATASOURCE_USER
- DATASOURCE_PASSWORD
- DATASOURCE_JDBC_DRIVER
User roles
The user roles import file should have the following columns in this order:
- USER_ROLE_NAME
- USER_ROLE_DESC
- USER_POLICY_NAMES
- VIRTUAL_FOLDER_NAMES
- GLOSSARY_NAMES
- METADATA_ACCESS
- DATA_ACCESS
- IS_DEFAULT_ROLE
- IS_ALLOW_JOB_EXECUTION
Glossaries
The glossaries import file should have the following columns in this order:
- GLOSSARY_NAME
- GLOSSARY_DESC
- GLOSSARY_COLOR
Business terms
Before importing any business terms, make sure you have created or imported the corresponding glossary.
The business terms import file should have the following columns in this order:
- GLOSSARY_NAME
- PARENT_LOGICAL_PATH
- TERM_NAME
- TERM_DESCRIPTION
- TERM_METHOD
- TERM_REGEX
- TERM_MINSCORE
- TERM_MINLEN
- TERM_MAXLEN
- TERM_ENABLED
- TERM_LEARNING_ENABLED
- EXTERNAL_ID
- EXTERNAL_SOURCE_NAME
- TERM_SYNONYMS
- ENTITY
- ANCHOR
- CREATE_RESOURCE_TERM_ASSOCIATION
- DEFAULT_OR_CUSTOM
- EXPRESSION
You can use the term name to show hierarchy in business terms by using dot notation for naming the business term, as shown in the following example:
1. "Sales","Orders.Jan.Week1","Tag for Orders",VALUE,,0.0,0,0,true,true,,,""
The example above identifies a business term Week1 with the parent
business term Jan and grandparent business term Orders
under the Sales glossary.
Term associations
Before importing any term associations, make sure you have profiled the virtual folder and have imported the corresponding business terms and glossary.
The term associations import file should have the following columns in this order:
- GLOSSARY_NAME
- TERM_NAME
- DATASOURCE_NAME
- RESOURCE_NAME
- FIELD_NAME
- TERM_PROPAGATION
- TERM_ASSOCIATION_STATE
Virtual folders
Before importing csv files into virtual folders, you must create or import the respective parent data source.
The virtual folders import file should have the following columns in this order:
- VIRTUAL_FOLDER_NAME
- VIRTUAL_FOLDER_DESC
- VIRTUAL_FOLDER_PARENT_NAME
- VIRTUAL_FOLDER_DATASOURCE
- VIRTUAL_FOLDER_PATH
- VIRTUAL_FOLDER_INCLUDE
- VIRTUAL_FOLDER_EXCLUDE
- IS_VIRTUAL_FOLDER_ROOT
Custom properties
The custom properties import file should have the following columns in this order:
- CUSTOM_PROPERTY_NAME
- CUSTOM_PROPERTY_DISPLAY_NAME
- CUSTOM_PROPERTY_DATATYPE
- CUSTOM_PROPERTY_DESC
- CUSTOM_PROPERTY_GROUP_NAME
- CUSTOM_PROPERTY_GROUP_DESC
- IS_CUSTOM_PROPERTY
- IS_CASE_SENSITIVE
- IS_SEARCHABLE
- IS_FACE_TABLE
- CUSTOM_PROPERTY_READ_ROLE
- CUSTOM_PROPERTY_WRITE_ROLE
Import metadata
Follow the steps below to import metadata:
Procedure
On the Home page from the left-side menu bar, click Tools.
The Tools page opens.Select the Model – Import / Export tab.
The Model – Import / Export Tool opens.Click Import.
The import-specific fields appear.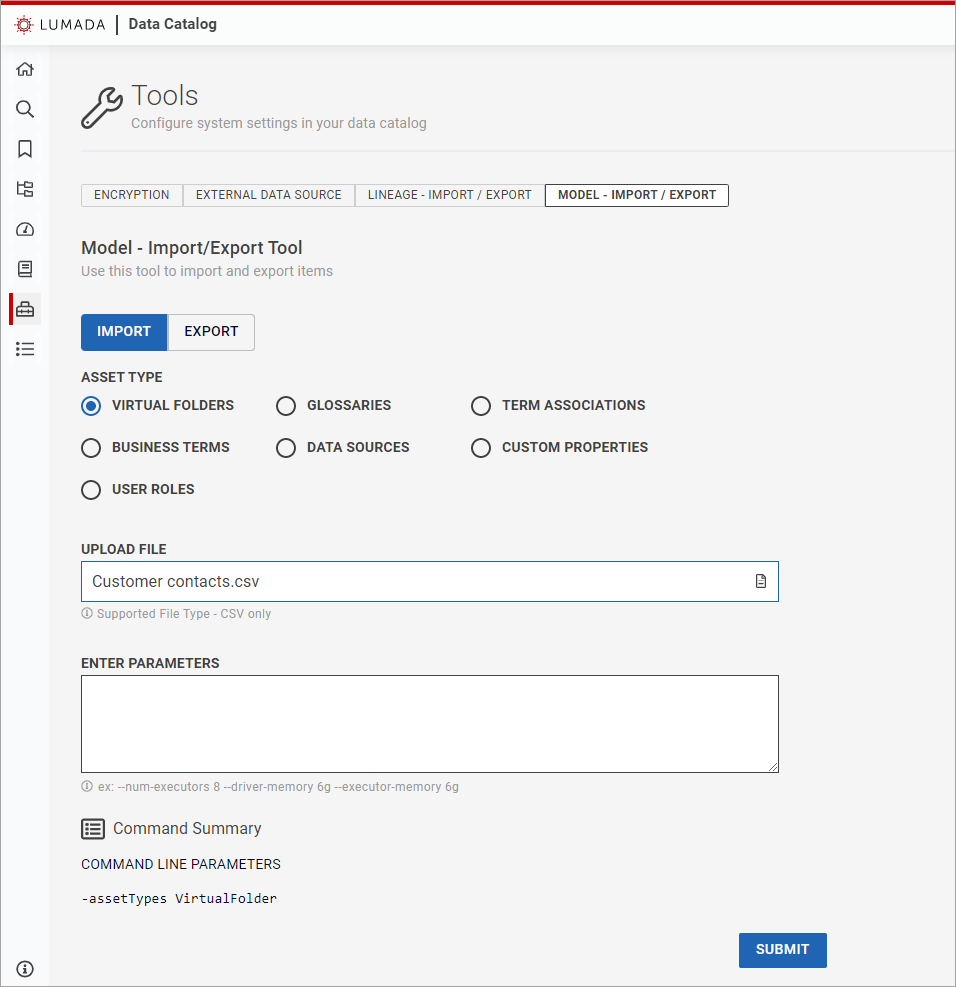
Select the asset type for the imported metadata.
Specify the location of the metadata file in Upload File.
In the Enter Parameters text box, enter any optional command line parameters, such as [
The specified parameters appear in the Command Summary section.--num-executor], [--driver-memory] or [--executor-memory], that you want to apply to the import.Click Submit.
Results