Search dimensions and custom facets

In Lumada Data Catalog, the administrator can control visibility of facets in the search results for users. With the search dimension defined for a particular role, users are shown the search results categorized by the search dimensions defined for that role.
For example, you may want to limit the search results for an analyst role to categories like Rating, Last profiled time, Resource tag, Virtual folder and a custom facet, such as Claims that is related to the analyst role's business function. For the analyst user, any search results are faceted depending on the search dimensions you set.
You can define search dimensions for both Resource and Fields.
- The Resource facets use the following icons:
Icon Meaning 
Default facet 
Custom facet 
Custom facet group The default Resource facets are listed below:
- File format
- Resource type
- Resource size
- Rating
- Resource origin
- Last profiled time
- Data source
- Virtual folder
- Resource tag
- Resource tag association state
- Field tag
- Field tag association state
- Processing status
- Sensitivity
- Resource state
- Fields facets are default facets that have a
Facet icon like the default Resource
facets icon. Custom facets and facet groups are not supported in
Fields facets. The default Fields facets
are listed below:
- Data type
- Field tag
- Field tag association state
- Cardinality
- Selectivity
- Density
- Data source
- Virtual folder
- Sensitivity
By default, if the search dimension is not set for a role, then all available facets are visible in the search results for that role. However, the role will not control the ability to select fewer facets applicable to the role. You can provide the role the control to filter applicable facets by setting the Search Dimensions.
Using pre-filter values for custom search dimensions
You can further limit user search results by setting pre-filter values for custom search dimensions. With pre-filter values set for custom search dimensions when applying search dimensions to custom roles, users with these custom roles receive search results limited to resources that have the custom facets set to the pre-filter values.
For example, you can limit the search results of a custom analyst role, NorCal_Analyst, to resources that have the custom facet "Region" set to NorCal. When editing this role, under Search Dimensions, you add the custom facet "Region", marked as Searchable and facetable and visible to roles Analyst and above, and add a Pre-Filter value "NorCal" for it.
The user with the custom NorCal_Analyst role now sees their search results pre-filtered to show resources having custom facet "Region" value as NorCal.
Add resource facets to search dimensions
Procedure
Navigate to Manage, then click Roles.
Select the role for which you want to set the search dimensions.
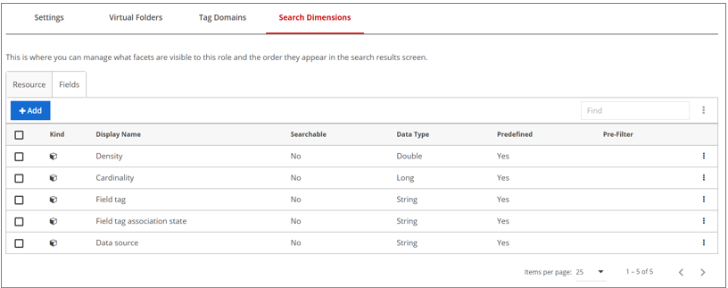
Click Search Dimensions and then click the Resource tab.
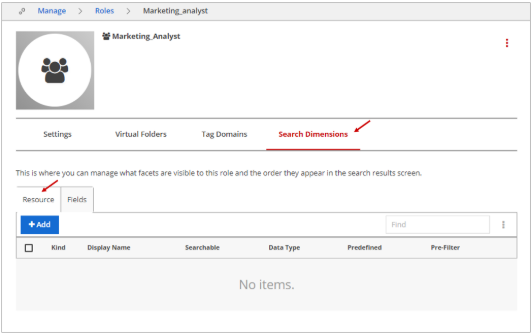
Click Add.
The Add Facets to Role dialog box appears.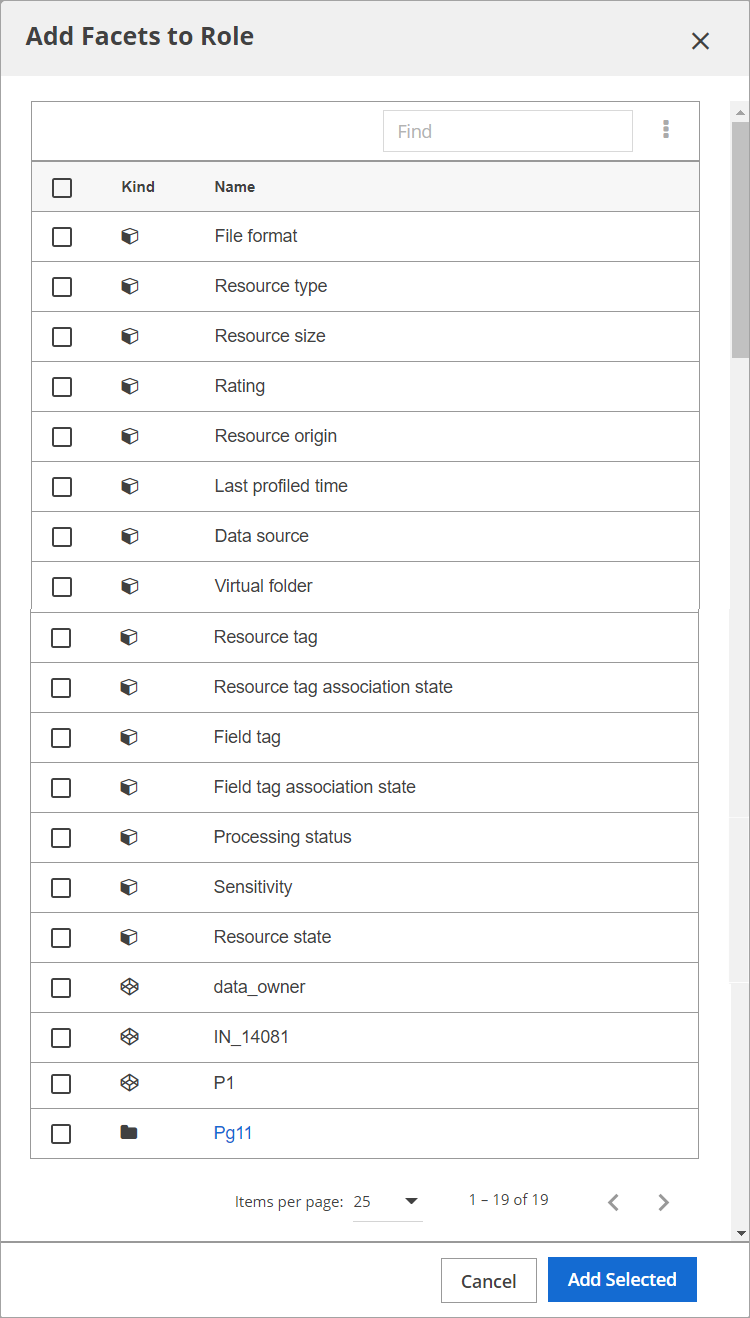
Select the facets for this role and click Add Selected.
NoteWhen adding a custom property in a property group, as facet in search dimensions, it is added as the group. For example, if you have a group “Claims” with three custom properties of “Status”, “Claims Region” and “Code”, and you want to add only “Claims Region” as a custom facet, then this facet appears under the group listing of “Claims” in the list of Search Dimensions.The resource search dimensions for this role are restricted to the selected facets.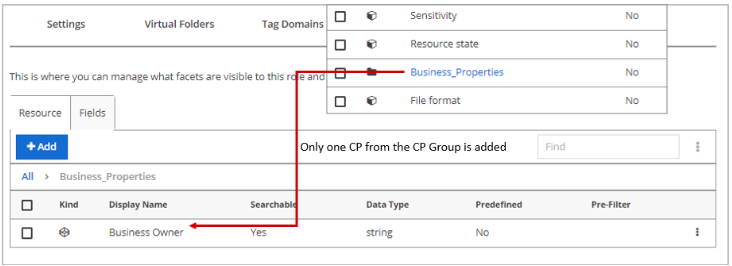
Add field facets to search dimensions
Procedure
Navigate to Manage, then click Roles.
Select the role.
Click Search Dimensions, and then click the Fields tab.
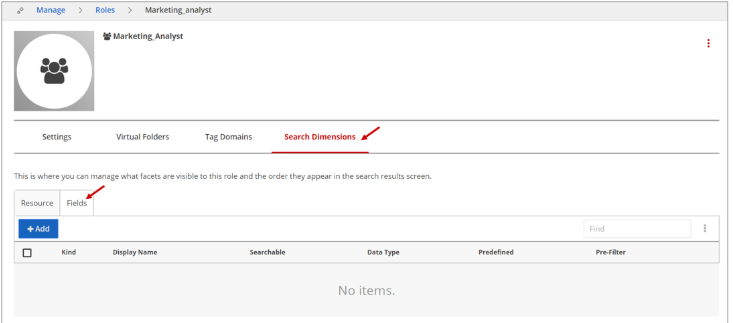
Click Add.
The Add Facets to Role dialog box appears.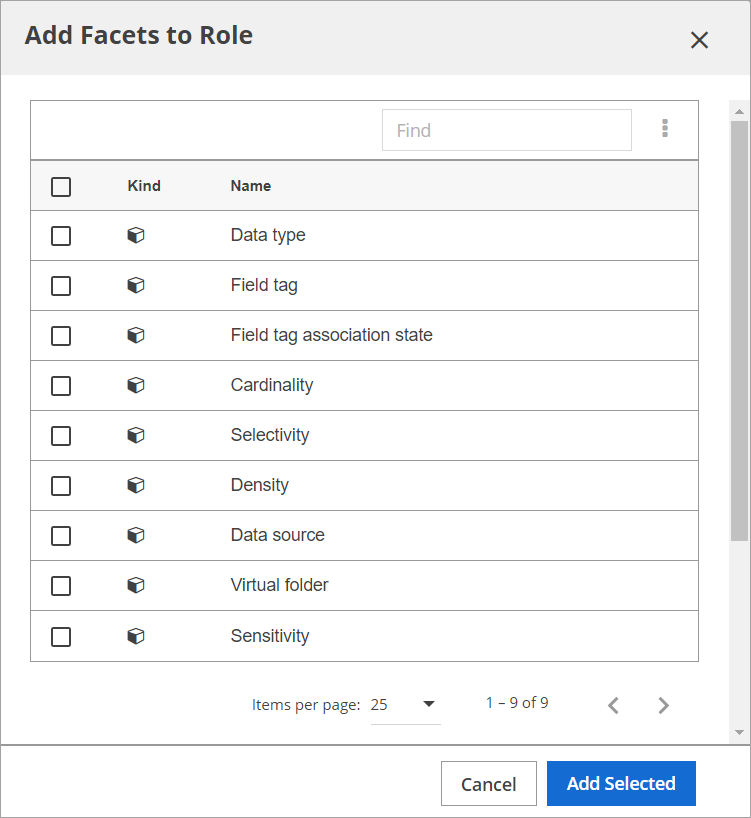
Select the facets for this role and click Add Selected.
Results
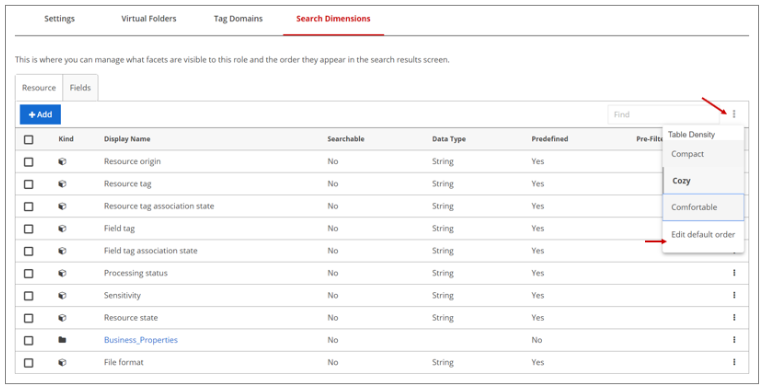
Edit the default facet order
Perform the following steps to customize the order of the facets.
Procedure
Navigate to Manage, then click Roles.
Select the role.
Click Search Dimensions and then click the Resource tab to reorder the resource facets, or the Fields tab to reorder the fields facets.
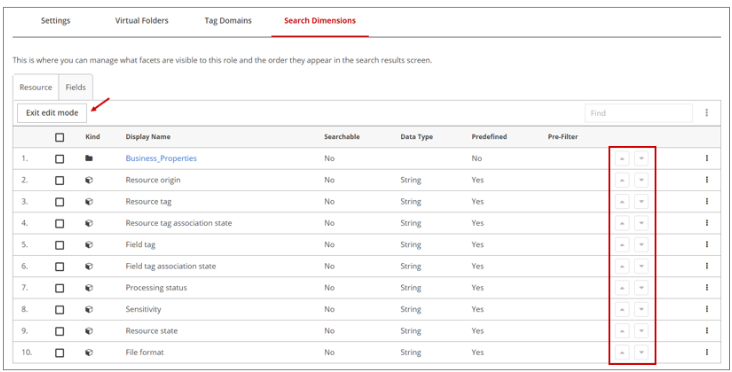
Click the More actions icon and select Edit default order from the drop-down menu.
Use the arrow buttons to reorder the facets as desired then click Exit edit mode.
Results
Set pre-filters for custom search dimensions
Perform the following steps to define pre-filters.
Procedure
Navigate to Manage, then click Roles.
Select the role for which you want to set the pre-filter.
Click Search Dimensions, and then click the Resources tab.
Locate the custom property for which you want to set the pre-filter value.
If the custom property belongs to a group, navigate to the group listing of the custom group. For example, if the custom property "Claims Status" belongs to the "Claims" group, then go to the group listing for "Claims".
Hover the mouse over the custom property to highlight the More actions icon.
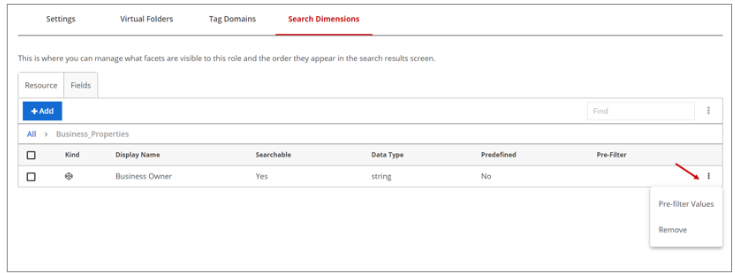
Click the More actions icon and select Pre-filter Values from the drop-down menu.
The Set Pre-filter Values dialog box appears.Enter the pre-filter value.
If adding a list of pre-filter values, click Add for each value added. When multiple values are set in the pre-filter, your user sees the search results filtered for all of these values. Your user has the option to view the unfiltered search results.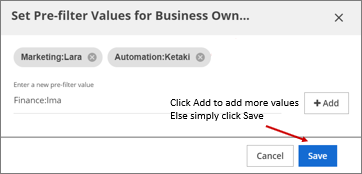
Click Save.
Results
Remove search dimensions and pre-filters
- You cannot delete custom properties that have defined values. You must delete these values from all resources before you can delete the custom property.
- If a custom property is applied as a visible facet, you cannot delete that custom property. An error listing the dependency with the associated user will display. You must remove these custom facets from the Visible facets pane of the Facet Settings dialog box within the search results before you can delete the corresponding custom property.
Procedure
Navigate to Manage, then click Roles.
Select the role you want to edit.
Click Search Dimensions.
Depending on the dimension that you want to delete, click the Resource tab or the Fields tab.
Navigate to the Remove search dimension option in one of the following ways:
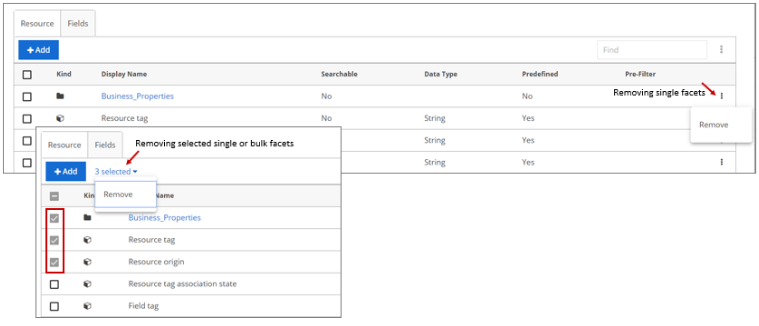
- Hover the mouse over the search dimension you want to remove and click the More actions icon.
- Select the check box for the dimension and click the Count selected link.
Proceed according to the search dimension or group that you want to delete:
- To remove a search dimension from the role, click Remove.
- To remove search dimensions in bulk, select the search dimensions you want to delete, then click Remove from the drop-down pane next to the Count selected link.
- To remove the group, repeat steps 4 and 5, then click Remove.
- To remove a search dimension that belongs to a group, navigate to the group's listing and then repeat steps 4 and 5, then click Remove.
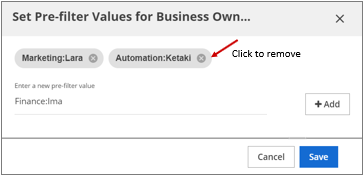
- To remove the pre-filter values, click on the pre-filter values appearing on the Search dimension page to open the Pre-filter dialog box. Click X to remove the value, and then click Save to update the pre-filter values.
Results