Managing custom properties

In Lumada Data Catalog, you can create custom properties that collect additional metadata about resources specific to their business environment or engagement. For example, you can define a custom property to include a business user name for a data resource. Alternatively, you could define a property that includes values that are used by system-level processes. You can group these properties together in custom property groups based on their business value or category and move them individually or in bulk across custom property groups. You can use these custom property groups as custom facets in the search results with search dimensions. Note that custom properties apply to only data resources.
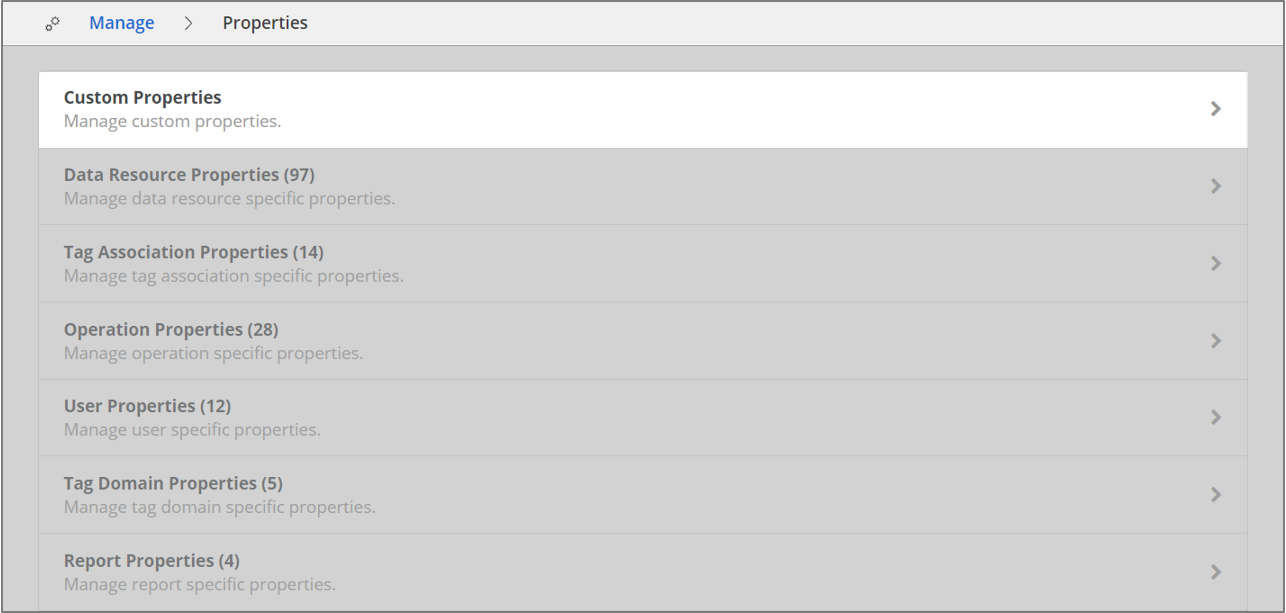
To add custom data resource properties, navigate to Manage, then click Properties.
While the Properties page lists a variety of properties, users can only manage Custom Properties in Data Catalog.
Add a new custom property group
Perform the following steps to add a custom property group.
Procedure
Navigate to Manage , then click Properties.
Click Custom Properties.
Click New, then select Group.
The Add new custom property group dialog box appears.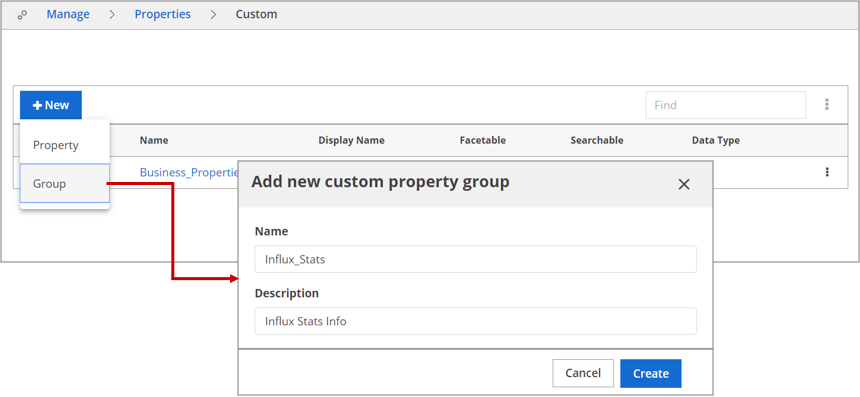
Enter values in the Name and Description fields for the new custom property group you are creating.
The name should begin with an alphabet and can include alphanumeric characters, hyphens and underscores. Data Catalog does not support including space characters or special characters in the Name field. Also, ensure that the name strings do not match any Data Catalog reserved names. For more information, see Data Catalog reserved names.Click Create.
Results
Edit a custom property group
Procedure
Navigate to Manage, then click Properties.
Click Custom Properties.
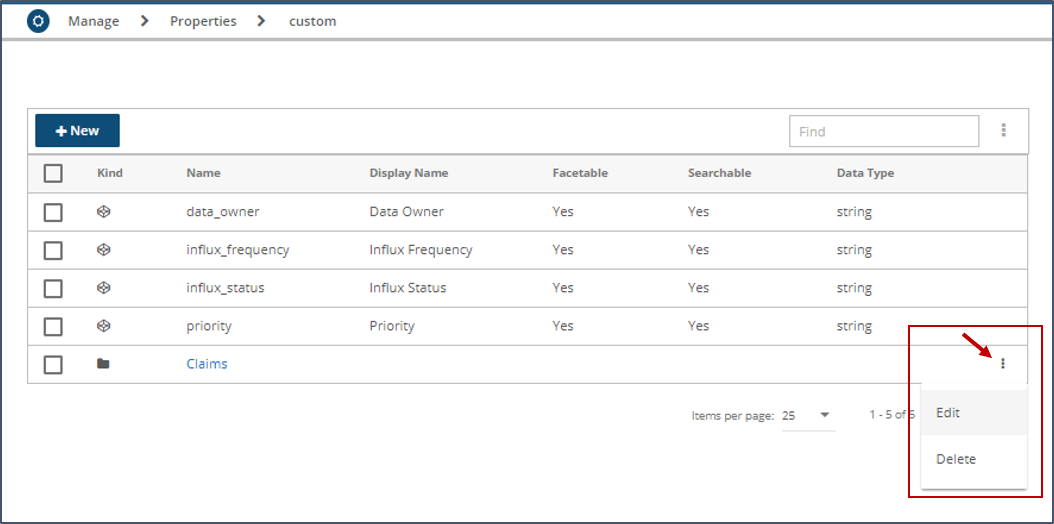
On the row of the custom property group that you want to edit, click the More actions icon and select Edit.
 The Edit dialog box appears.
Edit the Name or Description fields as needed.
Click Save.
Results
Add a new custom property
If your collection is configured across more than one shard, Hitachi Vantara considers it a best practice that you restart the Solr server after adding a custom property. Custom properties trigger a schema change for the collection, so the only reliable way to make sure that the change is propagated across all shards is to restart the Solr server.
Perform the following steps to add a new custom property.
Procedure
Navigate to Manage, then click Properties.
Click Custom Properties.
Click New, then select Property.
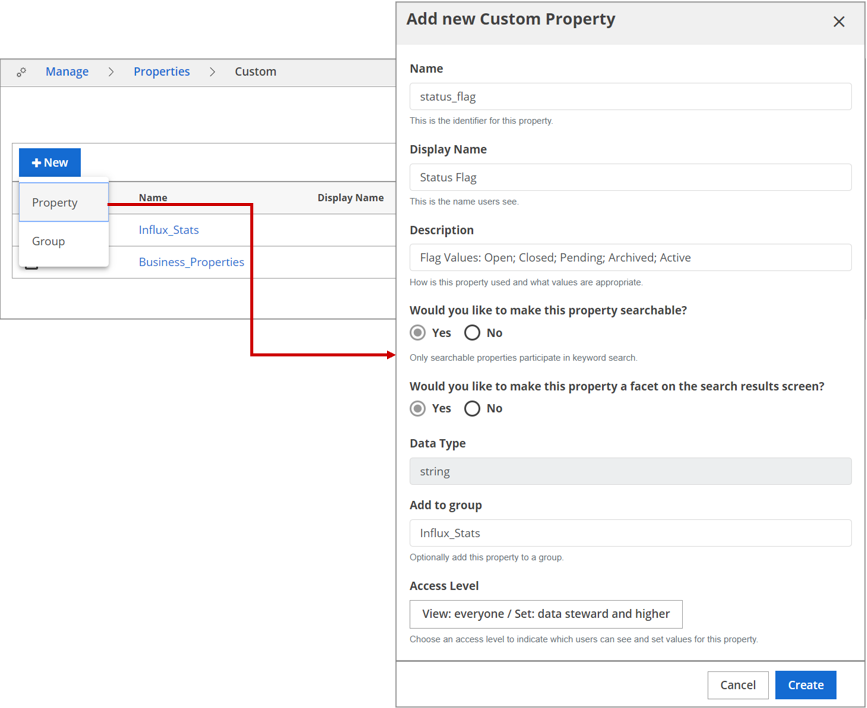 The Add new Custom Property dialog box
appears.
The Add new Custom Property dialog box
appears.Enter values for the following fields:
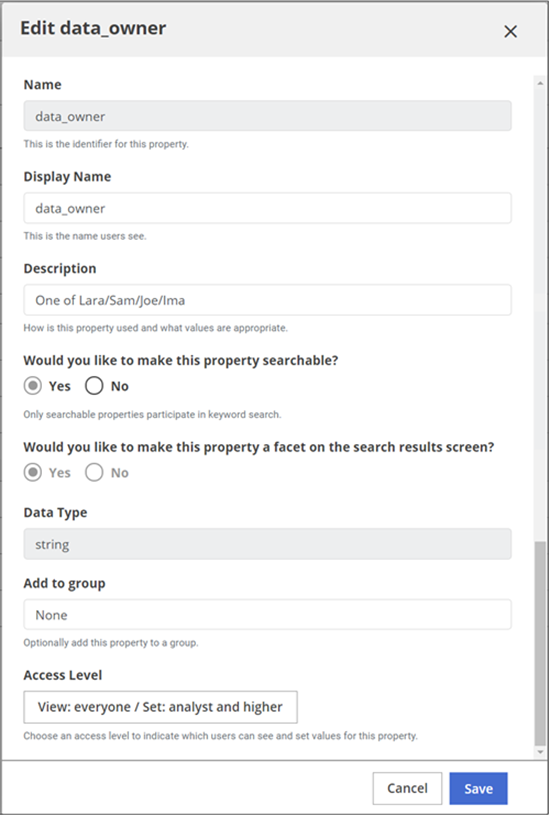
Field Description Name Enter the name to identify this property. The Name field should begin with an alphabetic character and can include alphanumeric characters, hyphens, and underscores. Lumada Data Catalog does not support including space characters or special characters in the Name field. Also make sure that the name strings do not match any Data Catalog reserved names. See Data Catalog reserved names. Display Name Enter the name that users see as a custom property in the resource view. Description Enter text that describes how this property is used and what values it can hold. This field is not included in metadata processing. Would you like to make this property searchable? Select Yes or No. If you choose to make the custom property searchable, the resources that have a value for this property appear in the search results for this property value. For example, if resource R has the defined value "Red" for the searchable custom property "Color", a search for "Red" lists resource R in the search results. If "Color" is not marked as searchable, the resource R does not appear in the search results for "Red."
The default value is No.
Would you like to make this property a facet on the search results screen? Select Yes or No. If you choose to make this property a facet, then based on the search dimension settings for a user, it shows as a facet in the search results to help narrow the results list for this property.
The default value is No.
Data Type The default value is string, which cannot be changed. Add to group (Optional) Add the new property to a group by selecting New to add a new group, and then adding a name for the new group. 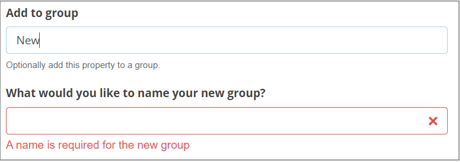 Alternatively, select one of the existing groups in the drop-down
list.
Alternatively, select one of the existing groups in the drop-down
list.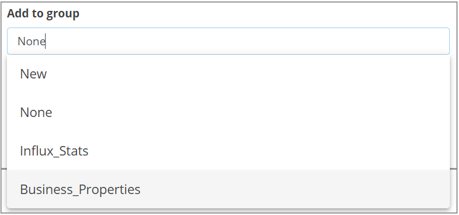 The default value is None.
 Access Level Select the user access level that is allowed to read or write to this custom property from the choices that appear. By default, the access level is set to View: everyone / Set: analyst and higher, indicating that this property is visible to all users, but can only be set or changed by users with roles of analyst and higher. 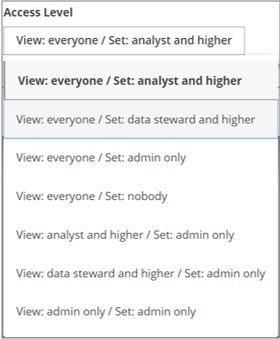 NoteIf a property is marked as not searchable, but facetable, the facetable definition takes precedence and the property appears in the facets of the search results. You can only set the searchable and faceted search values at the time you create the custom property. Once created, you cannot change these values during the lifecycle of the custom property.
Click Create.
The new custom property is created.
Edit a custom property
Perform the following steps to edit a custom property.
Procedure
Navigate to Manage, then click Properties.
Click Custom Properties.
On the row of the custom property you want to edit, click the More actions icon and select Edit from the drop-down menu.
Change the values for the available fields you want to update.
Click Save.
Results
Move a custom property
Perform the following steps to move a custom property:
Procedure
Navigate to Manage, then click Properties.
Click Custom Properties.
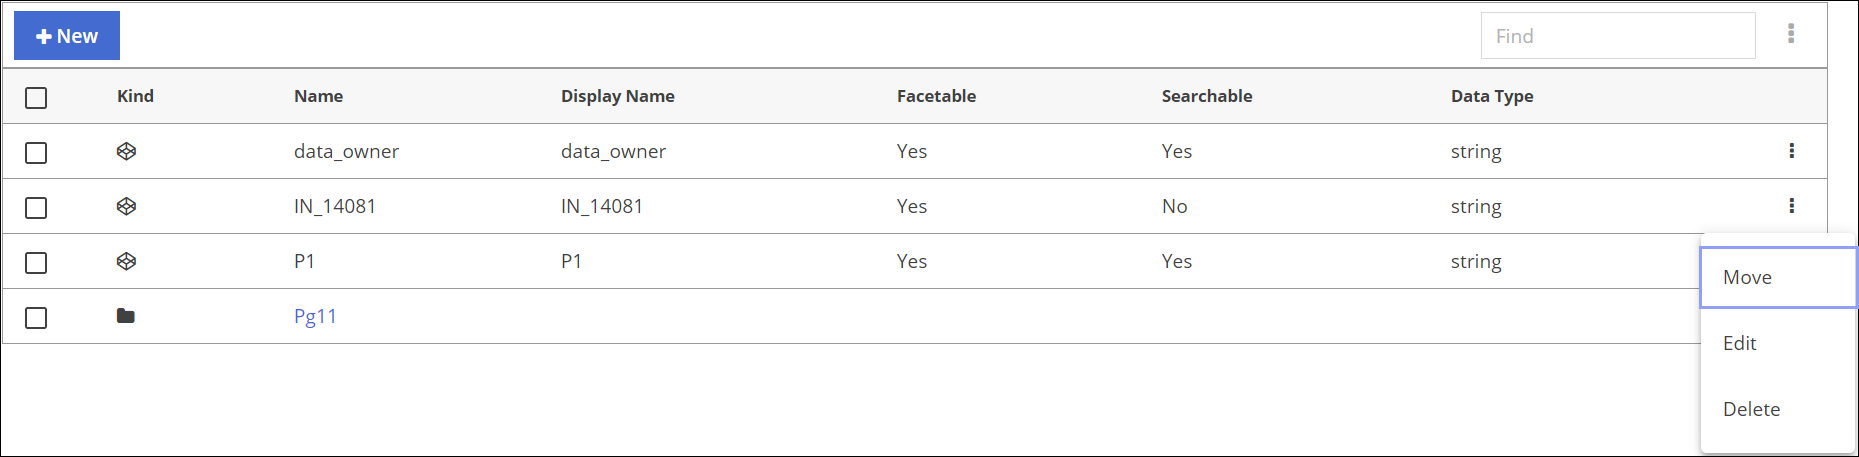
On the row of the custom property you want to move, click the More actions icon and select Move from the drop-down menu.
 To move multiple properties, select the check box next to each property. Click the
<count> selected link next to the
New button, and then select Move from the
menu that displays.The Move dialog box opens.
To move multiple properties, select the check box next to each property. Click the
<count> selected link next to the
New button, and then select Move from the
menu that displays.The Move dialog box opens.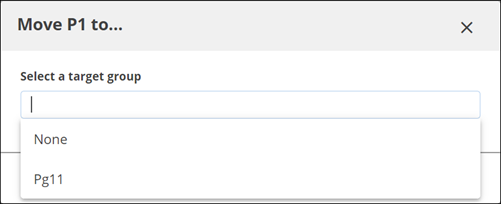
Select a target group from the Move dialog box. Start typing the name of the group in the field and select the best match from the list that displays.
Click Move.
The custom property is moved to the target group you selected. If you selected None as the target group, then the custom property is removed from the group.
Delete a custom property
If you delete a non-empty custom property group, the custom properties grouped within the group are automatically removed from the group and have None as the group association.
Procedure
Navigate to Manage, then click Properties.
Click Custom Properties.
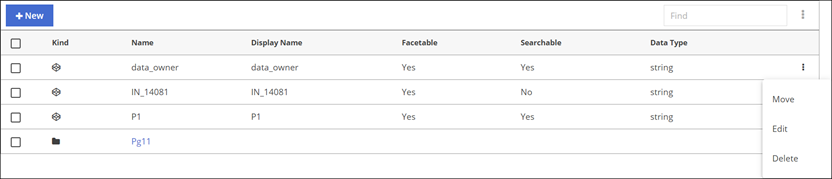
On the row of the custom property you want to delete, click the More actions icon and select Delete from the drop-down menu.
 To delete more than one property, select the check box next to each
property. Click the <count>
selected link next to the New button and
select Delete from the menu that displays.
To delete more than one property, select the check box next to each
property. Click the <count>
selected link next to the New button and
select Delete from the menu that displays.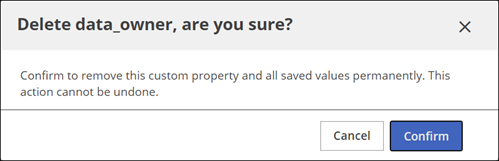 The Delete dialog box opens.
Click Confirm.
Results